Thursday, October 30, 2014

roasted red pepper sauce

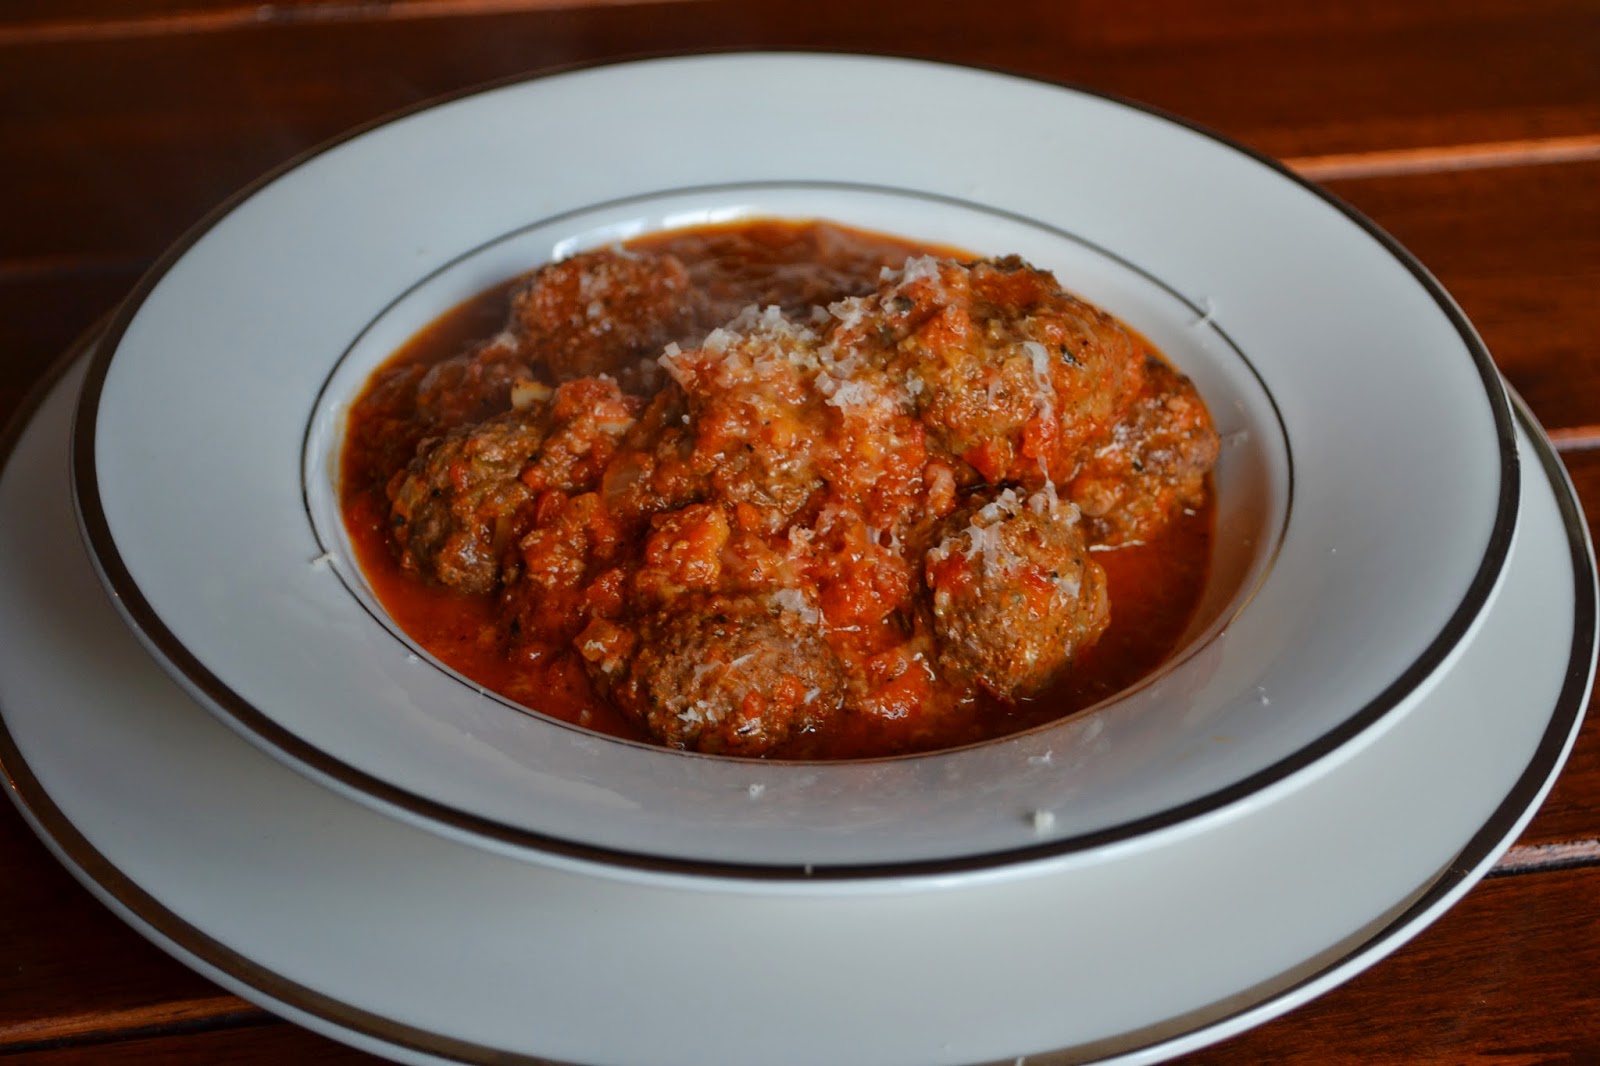
meatballs nestled in a roasted red pepper sauce
A nice change from the classic tomato sauce, this roasted red pepper sauce is really simple and your kids probably won't even notice that it's any different.  Tonight I served it with meatballs and rotini.  You can use it with other proteins (chicken, fish) or simply with any pasta as a quick meal.

what you need:
*makes enough sauce for 4 servings
  • 3 red bell peppers
  • 1 1/2 tbsp paprika (you can use smoked if you want more of a smokey flavour)
  • 1/4 yellow onion
  • 2 cloves of garlic
  • 1/4 tsp dried oregano
  • 1/4 tsp dried basil
  • 1 tsp coconut sugar (or brown sugar)
  • 1 bay leaf
  • 1/2 tsp worcestershire sauce
  • 1 tsp olive oil
  • salt and pepper to taste
what to do:
  1. If you have a gas stove, you can roast the red peppers directly on the flames.  Just turn every so often to get them charred (blackened) on the outside - they are ready when they are softened and blackened.  If you don't have a gas stove, roast them in the oven at 450 F on a lined cookie sheet, also until blackened on the outside.
  2. Place roasted peppers in a bowl and cover with lid or plastic wrap.  This will trap the heat and continue to steam the peppers.  Meanwhile, prep your other ingredients by chopping the onion and garlic finely, and measuring out your herbs.
  3. Once peppers are cool enough to handle, remove outer blackened skin (this should come off easily) and then the inside core/seeds.  Puree until smooth.
  4. In a sauce pan, heat up olive oil on medium and add onions.  Cook until softened and sweet, but not browned (therefore important to keep heat at medium).  Add garlic and sauté for another minute - then add the dried herbs and paprika, stirring consistently.  Once fragrant, add pureed peppers, worcestershire sauce, and sugar.  Bring to a slow boil then reduce to simmer, stirring occasionally, for about 20 minutes.
  5. The sauce is now ready - at this point you can use it on top of pasta or your protein - or you can put your protein into the sauce and let it simmer in the sauce for awhile to soak up more intense red pepper flavours.  I baked off my meatballs in the oven then transferred them to the sauce to simmer for about 15 minutes before serving with rotini.
  6. Enjoy!

Tuesday, October 28, 2014

carrot, kale & chick pea cakes


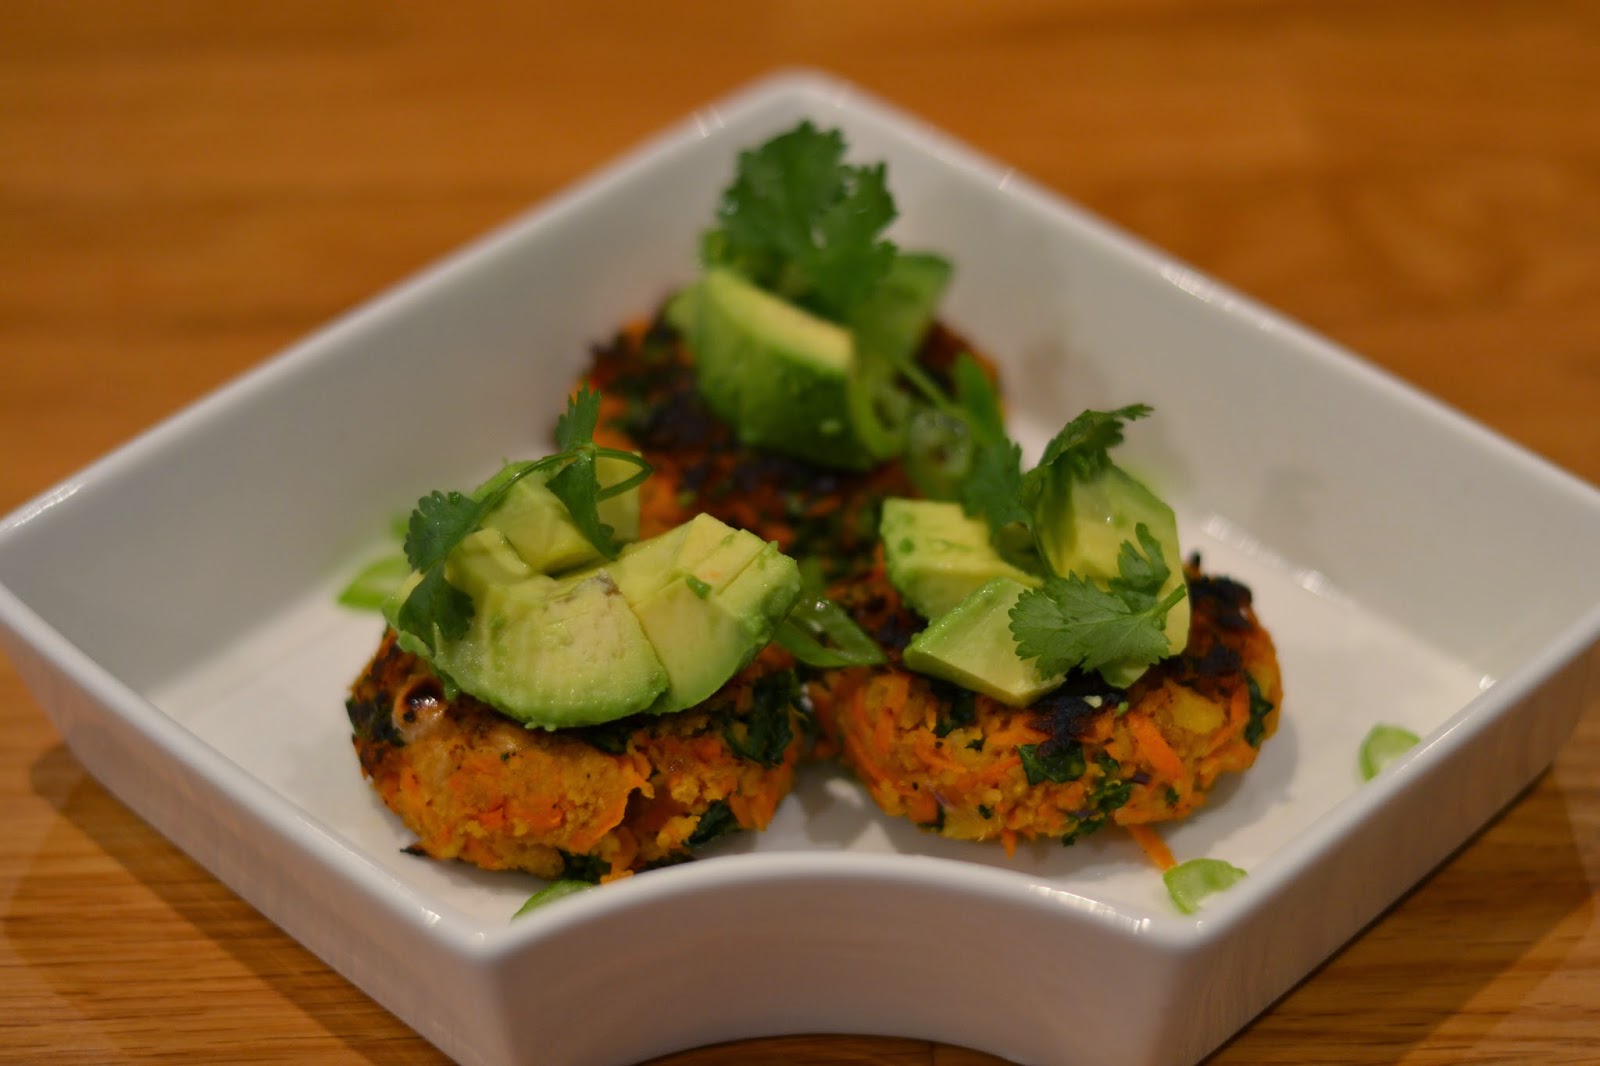
For a lighter meal but still satisfying and packed with nutrients, this veggie version of a crab cake is super easy, tasty and healthy.  Serve it up with your favourite condiment, salad, salsa, or even as a patty in a bun or wrap.  Tonight we had them with diced avocados then topped with a spoonful of peanut sauce.
topped with peanut sauce
what you need:
*makes about 8 cakes (~1" thick and 3" diameter)

  • 1 cup chick peas (fully cooked, you can use canned)
  • 1 cup (packed) finely chopped kale 
  • 2 medium carrots (peeled and grated)
  • 2 gloves of garlic, grated
  • 1/4 cup grated red onion
  • 1 large egg
  • 1 tbsp sea salt
  • 1/4 cup whole wheat panko (or any other bread crumb)
  • freshly ground black pepper
  • red chilli (optional) - finely chopped
  • 2-4 tbsp grape seed oil
  • 1 green onion, sliced thinly on an angle for garnish
  • excess carrot juice!
  • 1 few sprigs of fresh cilantro, roughly torn for garnish
what to do:
  1. Place grated carrots in a colander and sprinkle with 1 tbsp salt.  Lightly toss and then set over a large bowl and allow carrots to sit with the salt for about 30 minutes.  This step is important to draw out excess moisture in the carrots, to ensure your cake doesn't fall apart when frying.
  2. In a food processor or blender, puree chick peas roughly.  Leaving a few chunks will provide some texture to your cakes.
  3. Put kale, chick peas, red onion, garlic, egg, and red chilli in a large bowl.
  4. Squeeze excess liquid from grated carrots using your hands - this will also remove the most of the salt.
  5. Add carrots to the large bowl containing the rest of the ingredients and use your hands to mix, add panko and black pepper and continue to work the mixture until it comes together and you feel like it can be formed into cakes. 
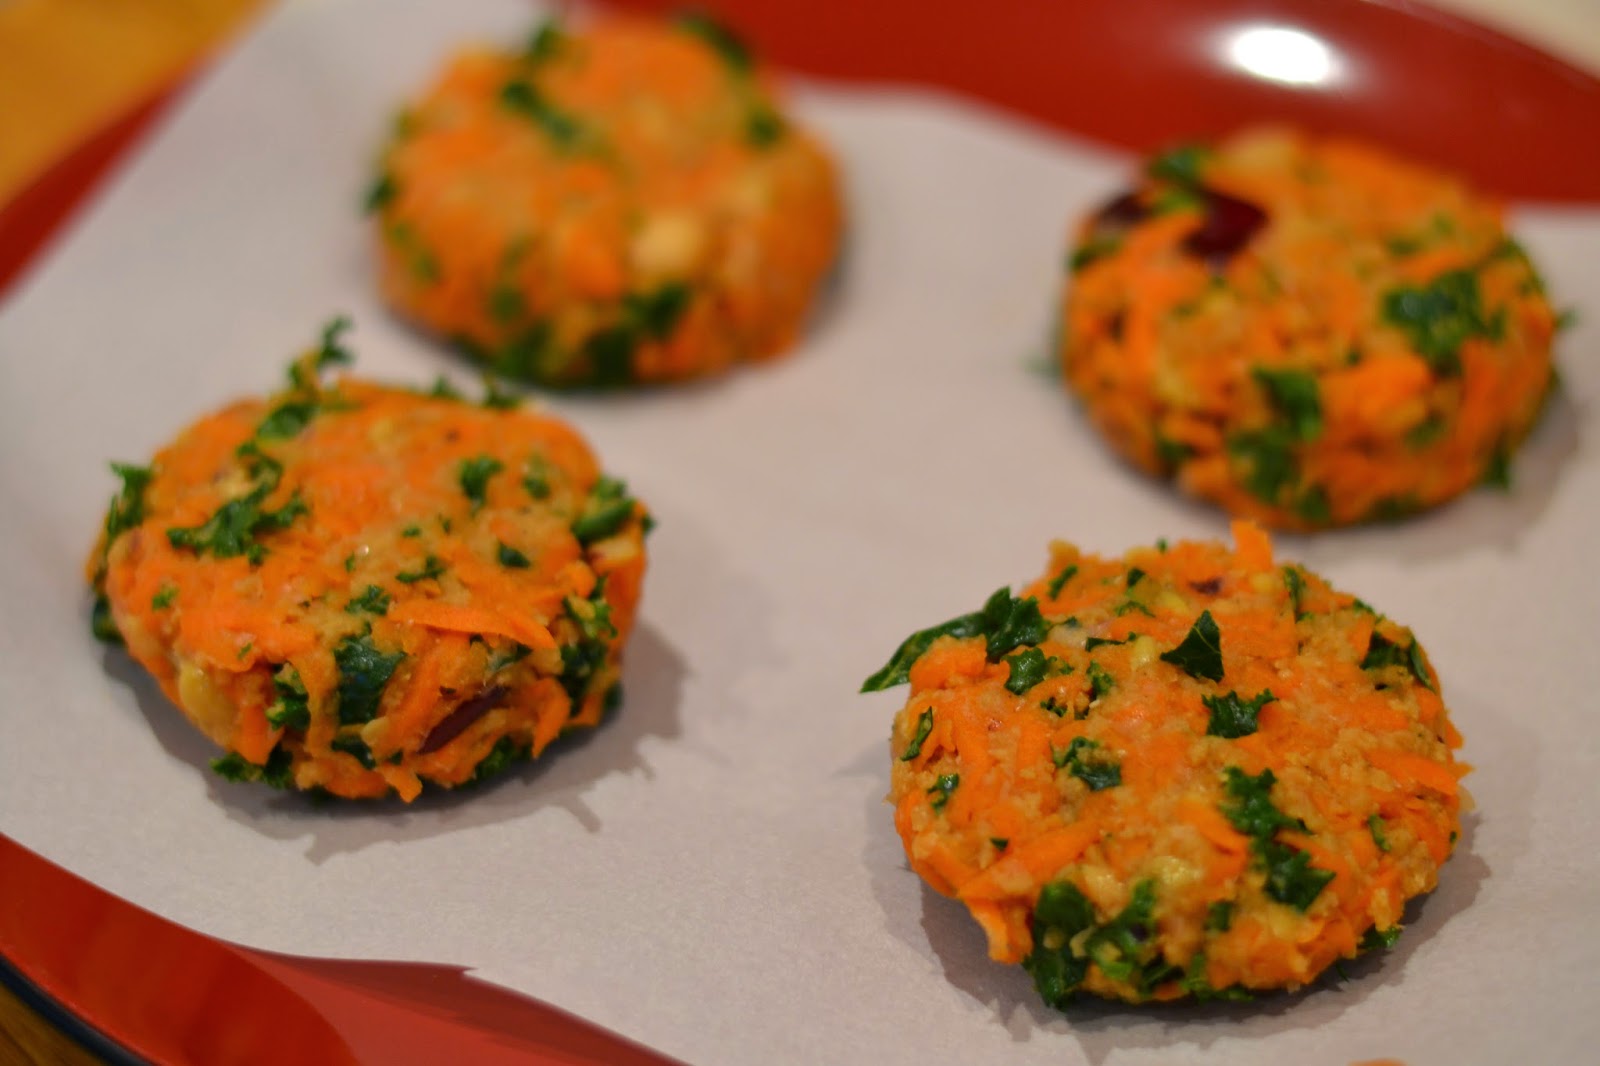
  6. Form cakes and place on a tray lined with parchment paper.  Refrigerate for at least 45 min (this allows your cakes to set so they don't fall apart when frying).
    ready for the fridge
  7. Heat a non-stick pan on medium with 2 tbsp oil.  Once they oil is hot, carefully place cakes and fry, about 3-5 minutes per side or until a golden crust forms.  You may need to add oil when you turn them over, if your pan seems too dry.
    after flipping these I added more oil
  8. Remove and place onto serving dish, sprinkle green onion and cilantro over top.  Serve with your choice of topping (we had avocado and peanut sauce while our 2 year old daughter chose ketchup).  Enjoy!

Thursday, October 16, 2014

"mochi" - sticky rice squares with red bean

a crunchy and chewy treat
If you've never tried "mochi" you have to try this!  You may have heard of ice cream mochi which is really popular right now - ice cream encapsulated by a chewy sticky rice exterior - but traditionally this Taiwanese snack is filled with red bean paste or sugared crushed peanuts.  The original mochi is steamed, therefore has a soft exterior; my mom has been making this baked version for as long as I can remember.  The baking creates a crunchy exterior which is a pleasant textural contrast to the sticky gooey inside.  The red bean paste has a subtle sweetness that will satisfy any sweet tooth without being cloyingly sweet.  Serving it warm minutes right out of the oven is the best way to enjoy it, but like any dessert, it's still delicious the next day!

I also realized today that this is a gluten and dairy free recipe.  Another popular trend!

Not a fan of beans?  Or you don't have red beans?  You can easily substitute something else such as jam, chocolate hazelnut spread, or even a cheesecake type filling.

what you need:
*for a 9 x 13" baking pan
  • 400 g (1 pkg) glutinous rice flour 
  • 2 eggs
  • 3 tsp baking powder
  • 1 pinch of salt
  • 3/4 cup sugar
  • 2 cups milk (I used unsweetened almond milk)
  • 2/3 cup vegetable oil (mild tasting such as grape seed or canola)
  • 2 cups red bean paste (purchased or make your own, see below)
this is a 8 x 8" square pan, recipe was halved
what to do:
  1. Preheat oven to 375 F.  Line baking pan with parchment paper or grease generously with butter for easy removal later.
  2. In a mixer, combine flour, baking powder, salt, and sugar.
  3. On low speed, slowly mix in eggs, milk and oil.  Mix until a smooth batter forms.
  4. Pour half the batter into the pan (it will seem like a thin layer).  Drop spoonfuls of red bean filling into the batter - try to make it evenly distributed but it doesn't have to be perfect.  Pour the rest of the batter on top and try your best to cover all of the filling.
  5. Bake for 45 min - 1 hr, until golden brown on top and a toothpick comes out clean.  If a toothpick comes out clean but your top is not browned yet, just switch your oven to broil for a minute to get your crunchy golden brown top.  
  6. Remove and cool for a few minutes - cut into squares while warm and enjoy!

Making your own red bean paste:

what you need:
  • dried red beans
  • water
  • sugar
  • brown sugar
what to do:
  1. Rinse 1 cup of red beans thoroughly.  Put beans into a small pot with enough water to generously cover them.  Bring to a boil then remove from heat and drain.
  2. Using the same pot, add fresh water just until beans are covered - bring to a boil and then turn down to simmer.  The beans will take awhile to cook until tender (about 20 - 30 minutes) - but make sure you check on them to prevent the bottom from burning.
  3. Once the beans are tender, add 2 tbsp brown sugar.  You can add more or less according to how sweet you would like your filling.  Taste and adjust accordingly.
  4. Turn off the heat and using a fork, gently mash the beans slightly.  It might seem like a lot of liquid but once the filling cools it will thicken.  You can store this in an airtight container in the fridge for several days.