Showing posts with label pasta. Show all posts

Thursday, October 30, 2014

roasted red pepper sauce

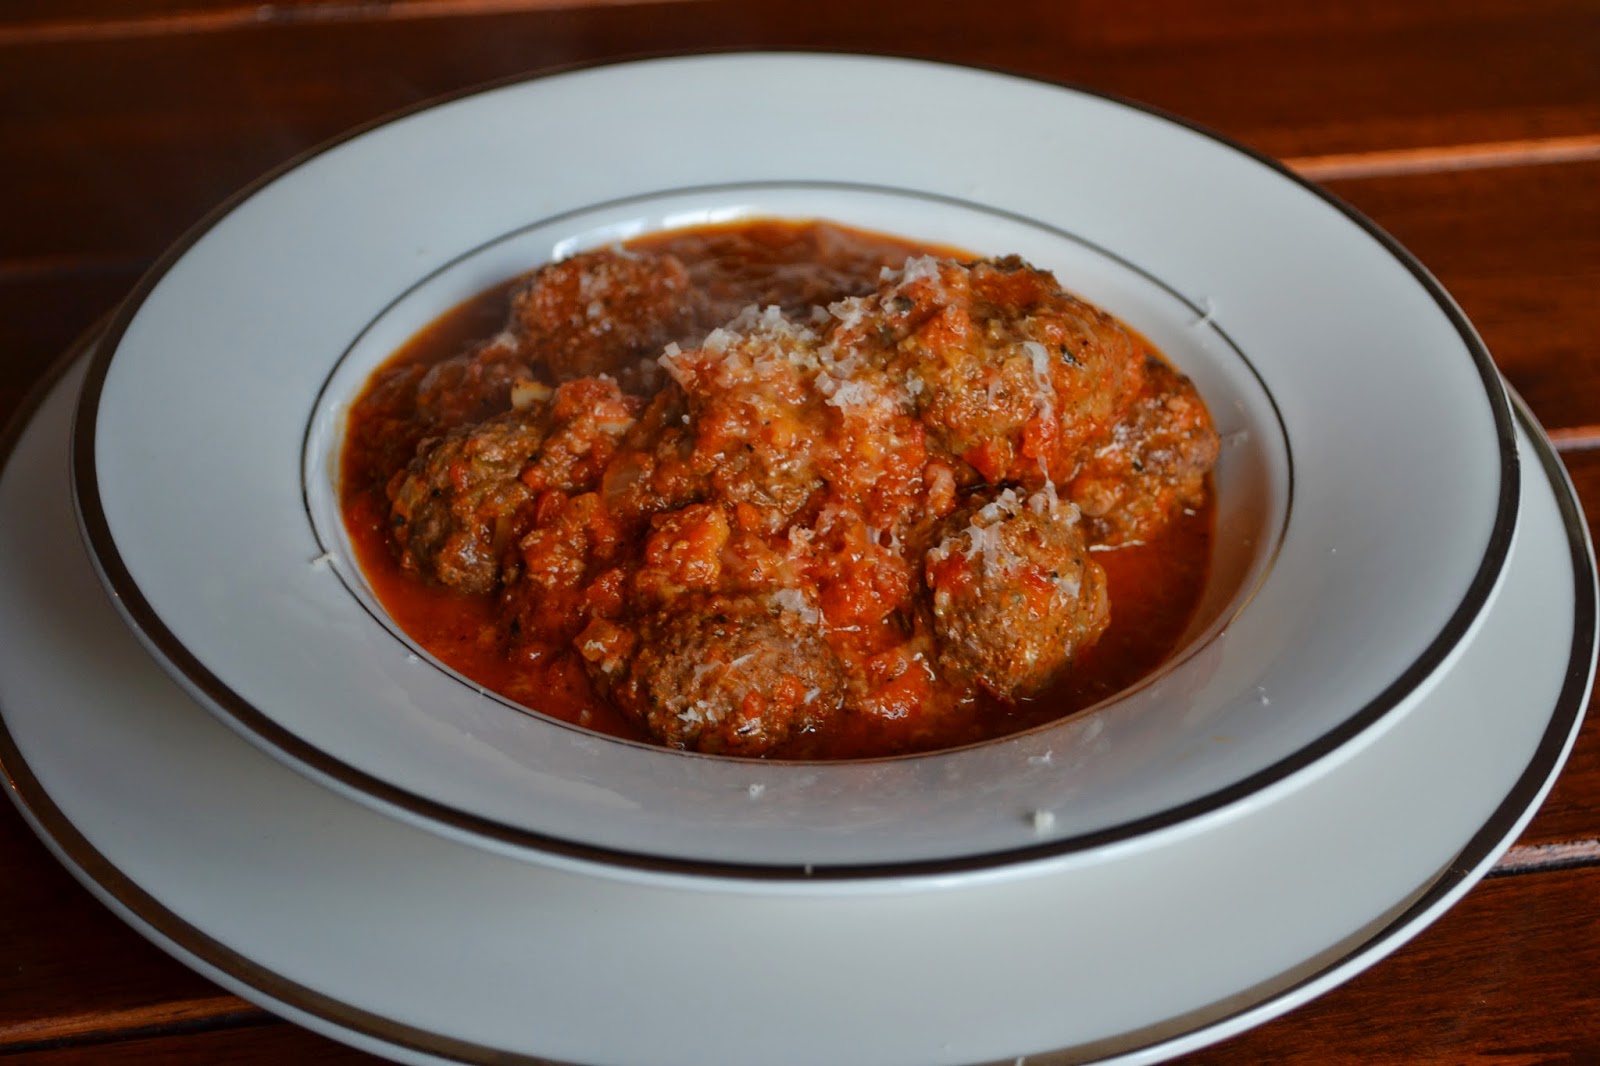
meatballs nestled in a roasted red pepper sauce
A nice change from the classic tomato sauce, this roasted red pepper sauce is really simple and your kids probably won't even notice that it's any different.  Tonight I served it with meatballs and rotini.  You can use it with other proteins (chicken, fish) or simply with any pasta as a quick meal.

what you need:
*makes enough sauce for 4 servings
  • 3 red bell peppers
  • 1 1/2 tbsp paprika (you can use smoked if you want more of a smokey flavour)
  • 1/4 yellow onion
  • 2 cloves of garlic
  • 1/4 tsp dried oregano
  • 1/4 tsp dried basil
  • 1 tsp coconut sugar (or brown sugar)
  • 1 bay leaf
  • 1/2 tsp worcestershire sauce
  • 1 tsp olive oil
  • salt and pepper to taste
what to do:
  1. If you have a gas stove, you can roast the red peppers directly on the flames.  Just turn every so often to get them charred (blackened) on the outside - they are ready when they are softened and blackened.  If you don't have a gas stove, roast them in the oven at 450 F on a lined cookie sheet, also until blackened on the outside.
  2. Place roasted peppers in a bowl and cover with lid or plastic wrap.  This will trap the heat and continue to steam the peppers.  Meanwhile, prep your other ingredients by chopping the onion and garlic finely, and measuring out your herbs.
  3. Once peppers are cool enough to handle, remove outer blackened skin (this should come off easily) and then the inside core/seeds.  Puree until smooth.
  4. In a sauce pan, heat up olive oil on medium and add onions.  Cook until softened and sweet, but not browned (therefore important to keep heat at medium).  Add garlic and sauté for another minute - then add the dried herbs and paprika, stirring consistently.  Once fragrant, add pureed peppers, worcestershire sauce, and sugar.  Bring to a slow boil then reduce to simmer, stirring occasionally, for about 20 minutes.
  5. The sauce is now ready - at this point you can use it on top of pasta or your protein - or you can put your protein into the sauce and let it simmer in the sauce for awhile to soak up more intense red pepper flavours.  I baked off my meatballs in the oven then transferred them to the sauce to simmer for about 15 minutes before serving with rotini.
  6. Enjoy!

Friday, November 16, 2012

chunky ragu

warm and comforting
There's nothing like a bowl of pasta to warm your soul and fill your tummy up on a cold day.  It's such a comfort food - this recipe requires a bit of time to allow the ingredients to marry together but it's definitely worth the wait.  You can use any type of pasta on hand, but I find with the chunkiness of the sauce a pasta like farfalle or penne works best.  For this recipe, I didn't use garlic but feel free to add a clove or two when you are sauteing the vegetables.

what you need:
*serves 4-6
  • 2 strips of bacon
  • ~450 g lean ground beef
  • 1 large yellow onion
  • 1 large can of diced san marzano tomatoes
  • 3 portabello mushrooms
  • 2 carrots
  • 2 celery sticks
  • 1 large jalapeno
  • 2 bay leaves
  • 1 tsp chopped fresh oregano
  • salt and pepper
  • canola oil
  • 1/2 cup water
what to do:
  1. In a large skillet or cast iron pan, cook bacon until crispy.  Remove and save the fat rendered.
  2. Prepare vegetables by finely dicing them all to about the same size.  Use the jalapeno seeds if you like more heat.  Chop up the bacon as well.                                                                 
  3. Put a little canola oil in your pan (about 1 tsp) - and lightly brown the ground beef on medium heat.  Lightly season the meat with salt and pepper.  Break up the meat using a wooden spoon.  Remove cooked beef from pan.
  4. Using the same pan, return the bacon fat and then add onions, carrots, celery, and jalapeno.  Once the veggies soften a little (about 5 minutes), add the mushrooms and continue to saute until they shrink in size, about 5 more minutes.  
  5. Add the beef, canned tomatoes, bacon, bay leaf, oregano, water, and some salt and pepper.  Put a lid on the pan.  When the sauce begins to bubble, reduce heat to low to simmer for 1 hour.  Stir occasionally.
  6. Remove bay leaf before serving, and taste to adjust salt/pepper if required.  Serve with your favourite pasta and top with freshly shaved parmesan.  Enjoy!

Thursday, October 18, 2012

jalapeno mac & cheese

cheesy goodness
My friend Kara was just by for a visit and this is what we had for lunch!  I was worried I wouldn't have time to make it before she got here but Madi was quite the good lil' baby this am.  I decided to make this because I know Kara has tried my broccoli mac and cheese recipe (and liked it!) but I wanted to throw in a little twist.  This recipe is inspired by the flavours you'd get in a jalapeno popper and a beer.

what you need:
*fills a 9 x 9" baking dish
  • 3 cups freshly grated old cheddar 
  • 1 cup freshly grated pecorino romano
  • 1/4 cup shredded Parmesan 
  • 2 slices multigrain toast
  • 2 shallots
  • 3 garlic cloves
  • 1 small jalapeno 
  • 1/2 beer
  • 1 cup of milk (1 or 2%...don't use skim!)
  • 2 tbsp butter
  • 1 tsp canola oil
  • 2 tbsp flour
  • salt and pepper
  • 3 cups dried macaroni 
what to do:


  1. Get a big pot of water going to cook your pasta. Cook it just under al dante because it will finish cooking in the cheese sauce later.
  2. Preheat oven to 400 F.
  3. While you're waiting for the water to boil, finely dice shallots, garlic, and jalapeno (remove seeds if you don't want it too spicy).  
  4. In a non-stick pan on medium heat, melt butter with canola oil and then add the flour (you are making a rue) - keep stirring until it makes a smooth paste and the flour becomes a slight golden colour.
  5. Add the shallots and garlic.  Turn the heat down to medium-low and try to incorporate it into the rue.  It may seem lumpy but that's OK.  Keep stirring and then after 1 minute add the jalapeno and continue to stir.
  6. After another minute or so (once the veggies have softened), slowing add the milk, whisking or stirring continuously.  Add the shredded cheddar and pecorino romano, stir and as the cheese melts the mixture should smooth out.  Add the beer then reduce heat to simmer on low for another 5-10 minutes.  Add desired amount of salt and pepper.
                                 
7.  While the sauce is simmering (remember to stir occasionally), toast the bread and then blend it roughly to make bread crumbs.  Mix well with the grated Parmesan.
8.  Add cooked pasta to the cheese sauce - stir well and turn off the heat.  It will seem liquidy but not to worry - the pasta will absorb all that cheesiness and will dry a little more after baking.

 9.  Pour into baking dish and top with breadcrumb mixture.  Bake for 12-15 minutes, then broil for 30 seconds to brown the top.  Serve hot and enjoy!

Saturday, September 10, 2011

"puttanesca" inspired pasta

an easy and quick dinner on a busy weeknight!
Puttanesca is traditionally an Italian sauce made up of anchovies, garlic, capers, tomatoes, red pepper flakes, and is served with spaghetti.  The meaning of puttanesca is a little humorous - meaning "whore" - so the original recipe "spaghetti alla puttanseca" means whore's pasta - as the ingredients are easy to get your hands on (probably right in your pantry/fridge).  Or, other sources state that the intense aromas of the sauce mimic the magnetic forces these women have to reel in the men.  Anyway, whatever the story is, this is my version of this dish.  I was literally down to very few items in my fridge and was craving pasta - and having a can of tuna as protein instead of anchovies and olives as my salty component instead of capers - lemon for some freshness - and adding broccoli to cram in some green nutrition.  It turned out quite delicious!

what you need:
*serves 2, with leftovers:)

  • 1 can flaked tuna
  • 1 small broccoli stalk
  • 2 large tomatoes
  • 5 cloves of garlic
  • 1/2 cup kalamata olives
  • 1 handful basil leaves
  • 1 lemon
  • 1 handful spaghetti pasta
  • 2 tbsp olive oil
  • 1 tbsp red pepper flakes
  • Parmesan cheese
  • salt & pepper
what to do:

  1. Get a large pot of water going on the stove to bring to a boil.  
  2. Cut broccoli into small bite size pieces.  Roughly chop garlic, tomatoes and basil.  Zest 1/2 the lemon.
  3. In a pan on medium heat, add olive oil.  Add tomatoes, lemon zest and garlic, be careful not to let the garlic burn.  While the tomatoes are breaking down on the heat, cook broccoli in boiling water for about 2 minutes, until bright green.  Remove broccoli, reserving the hot water.
  4. Cook the pasta in the same water as the broccoli, until al dante.  
  5. While pasta is cooking, add the broccoli, red pepper flakes, olives, and tuna.  If the pan appears too dry, add a little bit of pasta water (about 1/4 cup at a time).  Mix and season with salt (not too much, as the olives are salty) and pepper.
  6. Once the pasta is done, transfer to pan and toss gently with tuna, broccoli, olives, etc.  Reserve some pasta water to add, in case the sauce is too dry.
  7. Turn off the heat.  Add the basil then transfer to serving dish.  Grate Parmesan cheese on top to finish.  Serve with a slice of lemon to squeeze over pasta right before eating.  Enjoy!

Monday, March 21, 2011

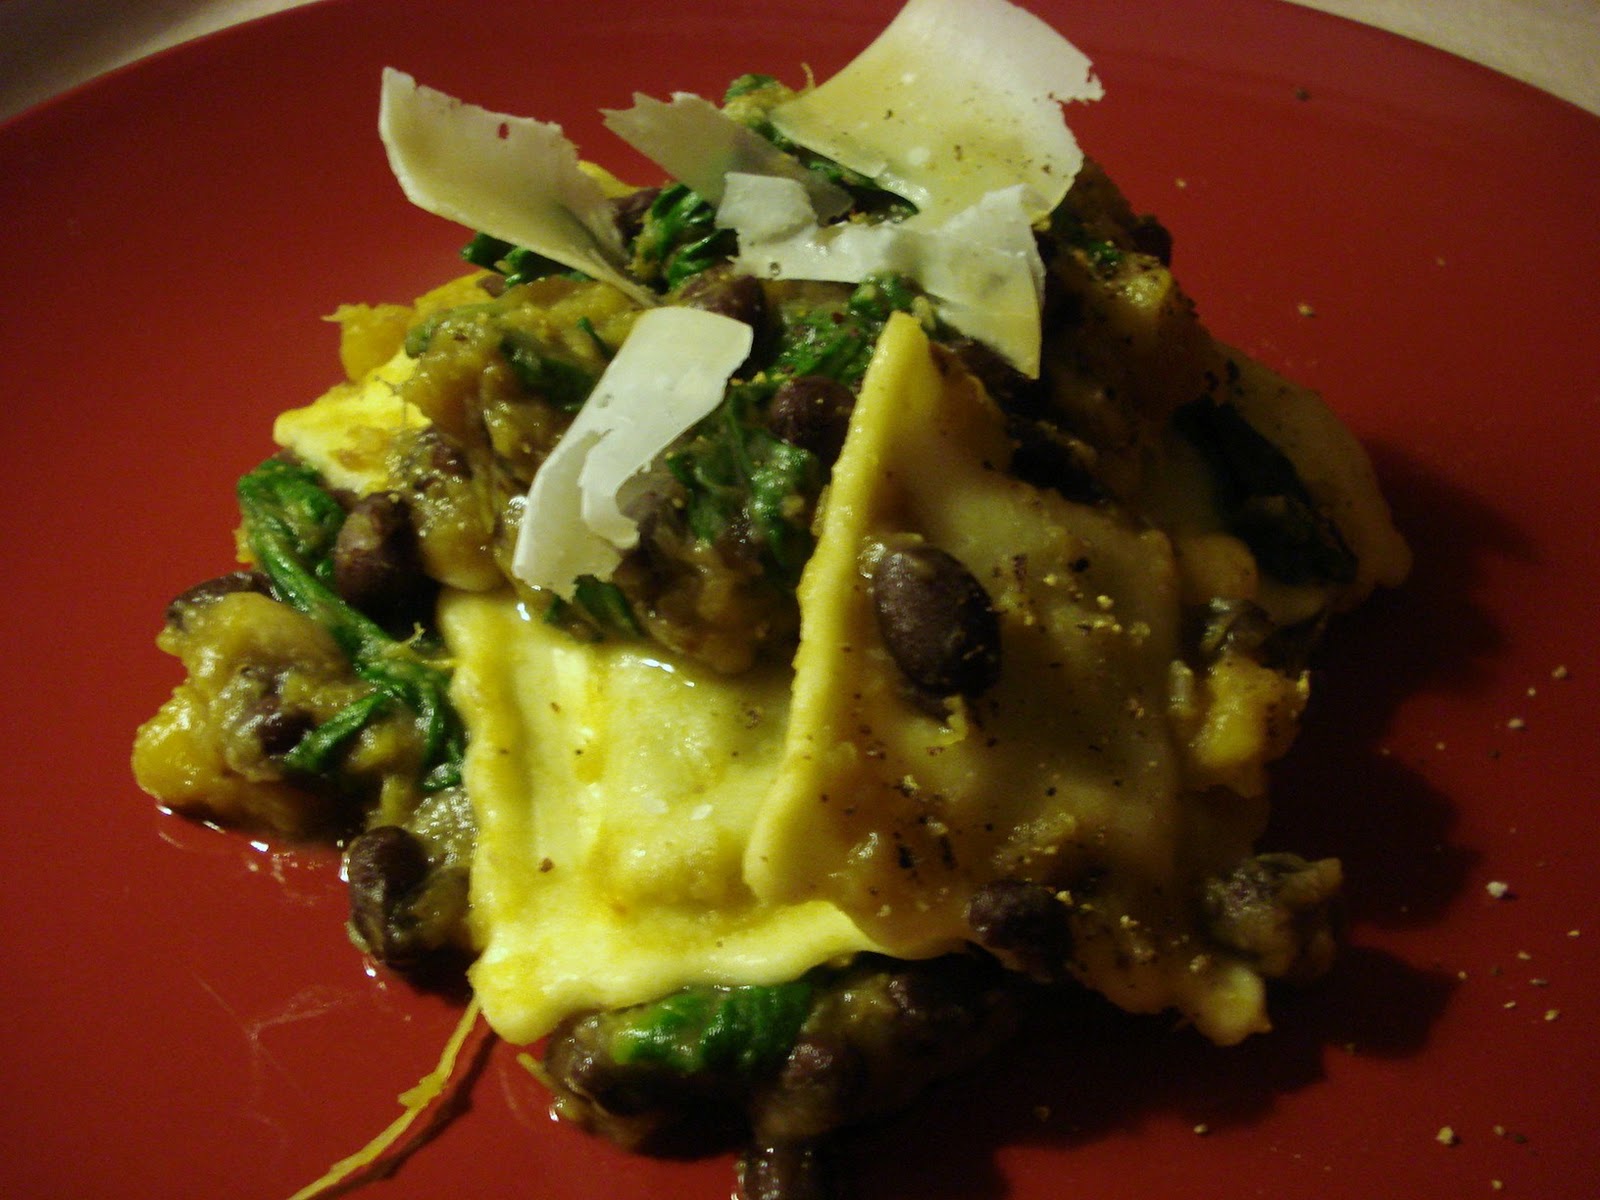
ravioli with black bean & acorn squash

you won't miss the meat with this veggie dish
Tonight I wanted to make something entirely vegetarian (for you sones!) and as I walked around the grocery store I thought acorn squash looked fun.  Black beans were the protein of choice because I thought its texture would marry nicely with the squash. The dried chillies make the dish because it balances the sweetest of the squash - you have to try this!
what you need:
*serves 4*
  • 1 acorn squash
  • 1 can of black beans (540 ml)
  • 5 handfuls of spinach
  • 1 head of garlic
  • extra virgin olive oil
  • fresh cheese & spinach ravioli (I used Ziggy's)
  • 2 dried red chillies or 2 pinches red pepper flakes
  • salt and pepper
  • Parmesan cheese 
what to do:
  1. Preheat oven to 400 degrees F.  Line a cookie sheet with aluminum foil.
  2. Cut up acorn squash into about 1" wedges - take the seeds out and save them for snacking later.  
  3. Trim the top off the garlic and drizzle with 1 tsp olive oil, add a small pinch of salt and pepper.  Wrap completely with aluminum foil.
  4. Toss the acorn squash with 2 tbsp olive oil and a sprinkle of salt and pepper.  Place the squash and garlic on cookie sheet and bake for about 40 minutes, flipping them halfway.
  5. Remove from oven and allow squash and garlic too cool before handling.  Remove skin from squash.  Drain and rinse the can of black beans.
  6. In a large pot, bring cold water to a boil to cook the ravioli (add about 2 tbsp salt to the water).
  7. Meanwhile, in a large saucepan on medium heat, add 1-2 tbsp olive oil and the red chillies.  Allow the chillies to blacken and crush them a little bit.  
  8. Before you cook the pasta, cook the spinach in the boiling water for 5-10 seconds then remove immediately with tongs or a spider and set aside.  Cook the ravioli for about 5-7 min, drain and save the pasta water.  
  9. Add the black beans to the pan and toss gently.  Add the squash and softly mash with the back of a fork.  Add the roasted garlic (hold it upside down and squeeze until flesh comes out).  Turn the heat to low and add 1 cup of pasta water, stirring gently until the beans and squash absorb it.  Depending on how dry the squash is, you many need to add more pasta water.  Add the spinach.
  10. In a large bowl, mix ravioli with the squash and black bean sauce.  Serve hot with freshly ground pepper and Parmesan cheese shavings.  Enjoy!  

Sunday, March 6, 2011

a whole chicken, a whole week

I have always wanted to eat more organic, local, free range and all that good environmental stuff.  It's definitely tough because of the prices.  Recently Ryan and I discovered that our local Loblaws carries Peterborough's Yorkshire Valley Farm organic free range chickens.  It is slightly more expensive, especially if you buy the boneless skinless packages.  But you can get a whole chicken, do the work at home and save some money.  So that's what we decided to do this weekend - get a whole organic free range chicken and use it wisely and maximally to provide multiple meals this week.  I divided the chicken into 4 parts - breast, wings, thighs, and middle bone.  Tonight I used the chicken thighs on the menu - linguine with roasted vegetable puree & roasted chicken.  I put the rest in the freezer for use later.

linguine with roasted chicken and vegetable puree
  
what you need:
*serves 2
  • 2 chicken thighs, skin on
  • 1 small can whole tomatoes or 2-3 fresh tomatoes quartered
  • 1 celery stalk
  • 1 large carrot
  • 1 medium onion
  • 1 red pepper
  • 3-5 cloves garlic
  • salt 
  • pepper
  • 1-2 pinches dried red chili flakes
  • 1 tbsp olive oil
  • 1 handful of linguine 
  • Parmesan cheese, freshly grated
what to do:
  1. Rinse the chicken legs and then pat dry with paper towel.  Season with salt and pepper and a little bit of olive oil.  Set aside.  Preheat oven to 375°.
  2. Chop onion, red pepper and celery roughly, about 1" thick.  Cut the carrot slightly smaller.  In a shallow baking dish, mix vegetables with garlic cloves, chili flakes, olive oil, and a little bit of salt and pepper.  Place tomatoes evenly on top of vegetables (if you're using canned, add the juice too)
  3. Place chicken thighs on top of vegetables.  Put it onto the middle rack in the oven and bake for about 1.5 hours, or until carrots are fork tender and chicken is crisp on top.
  4. Remove chicken thighs from vegetables - (you may choose to remove the skin but it is a nice treat once in awhile) 
  5. Put vegetables into a food processor or use an immersion blender to puree - this will be your sauce for the pasta.  Be really careful as it will be very hot.
  6. Cook linguine in salted boiling water for about 9 minutes (depending on the brand) - drain and place into a large serving bowl.  
  7. Add pureed vegetables to the linguine and toss to coat, sprinkle Parmesan cheese on top.
  8. Serve chicken thighs on top of pasta - enjoy!
dividing up the chicken...
I realize this task isn't the most fun, but for about 20 minutes of work you can save a lot of money and you really take the time to appreciate the chicken and all the dishes you can create with the different parts.
this whole thing seems daunting, but if you follow the edges along
the bone you will find it's not too hard, and it doesn't have to be perfect
chicken thighs on top of vegetables, ready for the oven
chicken breasts, middle bone, and wings, ready for later