Sunday, March 1, 2015

wintery caesar salad

hearty, tangy, zippy, wam
Caesar salad is my husband's favourite - he always orders it at restaurants (instead of fries please, upgrade from garden salad) and it is a dressing we make at home frequently.  It really is about the flavour for us rather than the romaine lettuce.  Sometimes though, salad for a meal in -30 C weather just doesn't seem right - you just want something warm and fulfilling - yet at the same time at our house we still crave that caesar salad taste.  This is my winter version of a caesar salad, which satisfies our tastebuds and bellies.  Oh and it's also vegetarian friendly:).

what you need:
  • 1 bunch kale
  • 2 medium sweet potatoes
  • 1 small vidalia onion
  • 1 tbsp olive oil
  • 1/4 tsp garlic powder
  • pinch of salt and pepper
  • extra parmigiano reggiano for garnish
  • extra virgin olive oil for garnish
for simple caesar dressing:
  • 1 tbsp dijon mustard
  • 1/3 cup finely grated parmigiano reggiano
  • 1 small garlic clove, finely grated
  • 1 tsp worcestershire sauce
  • 1 1/2 tbsp red wine vinegar
  • zest of 1 lemon, juice of 1/2 lemon
  • pinch of salt and pepper
  • 1-3 tbsp of extra virgin olive oil
what to do:
  1. Preheat oven to 425 F and line a cookie sheet with parchment paper.  
  2. Combine all caesar dressing ingredients in a large salad bowl and whisk to combine. Taste - adjust accordingly to your preference (e.g. if you like a tangy acidic dressing then start with 1 tbsp olive oil).  
  3. Prep your veggies - tear kale leaves off the stem (bite size pieces) and wash thoroughly, then make sure to dry them off (use a salad spinner if you have one!).  Wash and peel sweet potatoes, then cut into 1/2" discs.  Thinly slice onion.
  4. Toss sweet potatoes with oil, garlic powder, salt and pepper.  Place on lined cookie sheet and bake for about 15-20 minutes; be sure to flip them halfway to get both sides of the sweet potato golden brown.
  5. During the last 10 minutes of baking, cook your onions and kale.  In a nonstick pan on medium-low heat with 1 tsp grapeseed oil, sauté onions until they are caramelized and softened, then add the kale.  Stir to make sure you wilt all of the kale - if it seems dry add 1 tbsp of water.  The kale should be wilted and bright deep green in about 2 minutes or so.
  6. Transfer kale and onions from pan to the salad bowl with your whisked dressing. Add roasted sweet potatoes and toss everything gently together, coating all the vegetables with the dressing. 
  7. Serve immediately with extra parmesan cheese shavings and a little drizzle of extra virgin olive oil over the entire plate.  Enjoy!

banana bran flax muffins

you could replace the chocolate chips with raisins...but they're better this way!
This recipe is very similar to my previous post (triple b banana bread) but with less ingredients and coconut sugar in place of regular sugar.  The muffins themselves are not very sweet which is why the addition of chocolate chips is quite necessary to satisfy that sweet treat craving...however if you are using them as a breakfast muffin (serving with jam, etc.) then substitute raisins and they are even healthier!

what you need:
  • 1 cup APF
  • 1 cup bran
  • 1/2 cup coconut sugar
  • 1/4 ground flax seed
  • 1/4 cup grapeseed oil
  • 1 tsp baking powder
  • 1 egg
  • 2 bananas
  • 1/4 tsp salt
  • 3/4 cup dark chocolate chips
  • 1/4 cup almond milk
what to do:
  1. Preheat oven to 350 F.  Line muffin tin with medium sized muffin cups.
  2. Beat bananas and coconut sugar until they are well mixed (I used a mixer but if you don't have one you can use a fork to mash up the bananas then whisk in the coconut sugar vigorously).
  3. Add oil, milk and egg to banana mixture, mix well.
  4. Combine dry ingredients (except for chocolate chips) together and stir with a fork to mix.
  5. Add dry ingredients to wet ingredients, mix just until combined (do not over mix as this will end up making tough dense muffins).
  6. Fold in chocolate chips.
  7. Fill muffin cups all the way - then bake for about 12 minutes, until a toothpick comes out clean (it may seem a bit moist but it's because of the bananas!) - remove from oven and transfer as soon as you can handle them to a cooling rack.  They are delicious warm but the muffin cup tends to stick at first so just beware.  Enjoy!
the recipe should make 12 -
I over filled slightly therefore was short one!

Thursday, December 4, 2014

butternut squash biscuits

serve these up alongside soup or stew
My two year old just loves these biscuits - and I have no problem serving them to her as they are packed with butternut squash!  My father in law (one of the pickiest eaters I know!) absolutely loved these...and our friends that visited last weekend were also big fans.  If you don't have butternut squash you can sub in sweet potato or pumpkin.

what you need:
  • 1 medium butternut squash (you need about 3 1/2 cups mashed, doesn't have to be exact)
  • 1 1/4 cup flour 
  • 1 tbsp organic coconut sugar (or any other sugar)
  • 4 tsp baking powder
  • 1/4 tsp salt
  • 1/4 cup unsalted butter
  • 1 tbsp olive oil
  • salt and pepper
  • extra flour for rolling out dough
  • extra butter for brushing biscuit tops
what to do:
  1. Remove peel and seeds from butternut squash.  (You can roast with the peel on and remove it after it's been roasted, if you don't have a strong enough peeler to do so when it is raw).  Cut into cubes (about 1"x1") and toss with olive oil and some salt and pepper. Roast on a cookie sheet lined with parchment paper at 450 F, for about 20-25 minutes.  Be sure to flip them halfway through to evenly roast the squash.
  2. Sift together flour, sugar, baking powder, and salt, in a bowl.
  3. Once the squash cubes are cool enough to handle, transfer them into a large bowl and mash with a potato masher or large fork.  Add butter and stir until butter melts into the squash.
  4. Add flour mixture to squash mixture, stirring gently until a loose dough forms.  Don't worry if it seems a little wet.
  5. Sprinkle work surface generously with flour and dump your dough onto the floured surface.  Cover your hands with flour and gingerly work the dough into a round disc and then flatten until about 1" thick. (Don't knead this dough - it should feel delicate but not crumbly).  Cut into triangular pieces (like a pizza) - I usually get about 6-8 very large biscuits or you can use a round cookie cutter to get disc shaped biscuits.
  6. Place biscuits on a cookie sheet lined with parchment paper (you can re-use the squash one!) - and brush the tops with melted butter.
  7. Bake for about 10-12 minutes at 450 F, until tops are lightly golden.  Remove and serve hot, ...with extra butter perhaps...enjoy!

Thursday, October 30, 2014

roasted red pepper sauce

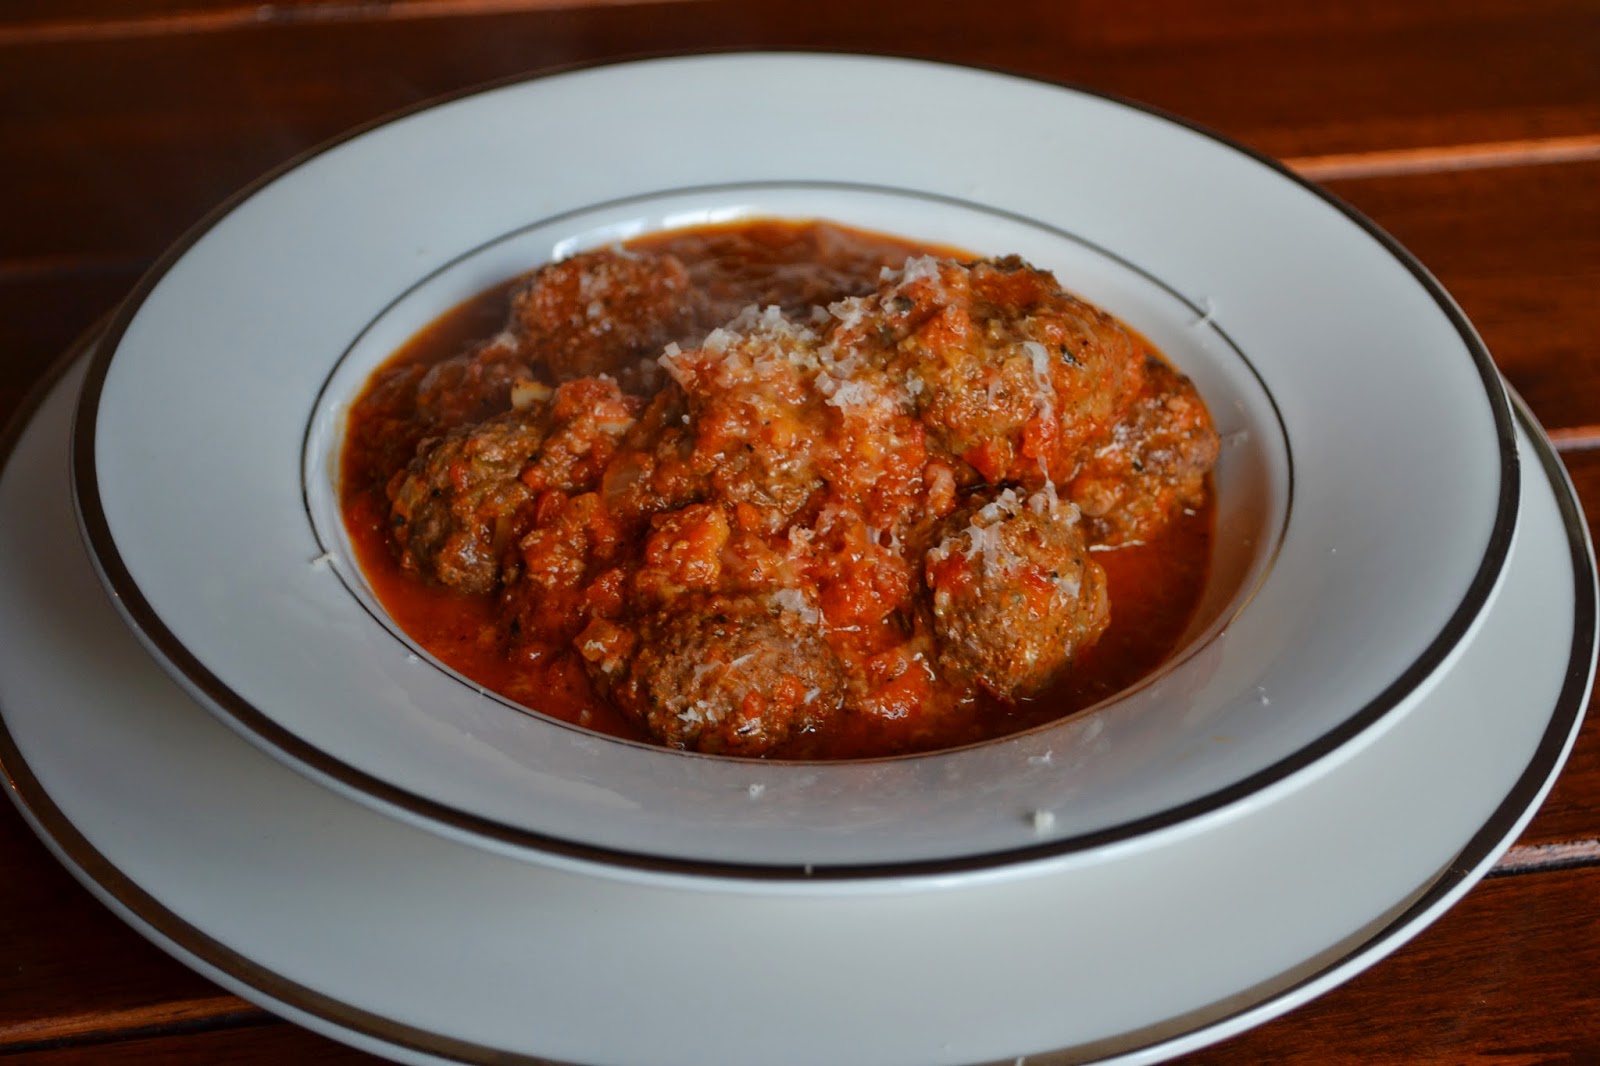
meatballs nestled in a roasted red pepper sauce
A nice change from the classic tomato sauce, this roasted red pepper sauce is really simple and your kids probably won't even notice that it's any different.  Tonight I served it with meatballs and rotini.  You can use it with other proteins (chicken, fish) or simply with any pasta as a quick meal.

what you need:
*makes enough sauce for 4 servings
  • 3 red bell peppers
  • 1 1/2 tbsp paprika (you can use smoked if you want more of a smokey flavour)
  • 1/4 yellow onion
  • 2 cloves of garlic
  • 1/4 tsp dried oregano
  • 1/4 tsp dried basil
  • 1 tsp coconut sugar (or brown sugar)
  • 1 bay leaf
  • 1/2 tsp worcestershire sauce
  • 1 tsp olive oil
  • salt and pepper to taste
what to do:
  1. If you have a gas stove, you can roast the red peppers directly on the flames.  Just turn every so often to get them charred (blackened) on the outside - they are ready when they are softened and blackened.  If you don't have a gas stove, roast them in the oven at 450 F on a lined cookie sheet, also until blackened on the outside.
  2. Place roasted peppers in a bowl and cover with lid or plastic wrap.  This will trap the heat and continue to steam the peppers.  Meanwhile, prep your other ingredients by chopping the onion and garlic finely, and measuring out your herbs.
  3. Once peppers are cool enough to handle, remove outer blackened skin (this should come off easily) and then the inside core/seeds.  Puree until smooth.
  4. In a sauce pan, heat up olive oil on medium and add onions.  Cook until softened and sweet, but not browned (therefore important to keep heat at medium).  Add garlic and sauté for another minute - then add the dried herbs and paprika, stirring consistently.  Once fragrant, add pureed peppers, worcestershire sauce, and sugar.  Bring to a slow boil then reduce to simmer, stirring occasionally, for about 20 minutes.
  5. The sauce is now ready - at this point you can use it on top of pasta or your protein - or you can put your protein into the sauce and let it simmer in the sauce for awhile to soak up more intense red pepper flavours.  I baked off my meatballs in the oven then transferred them to the sauce to simmer for about 15 minutes before serving with rotini.
  6. Enjoy!

Tuesday, October 28, 2014

carrot, kale & chick pea cakes


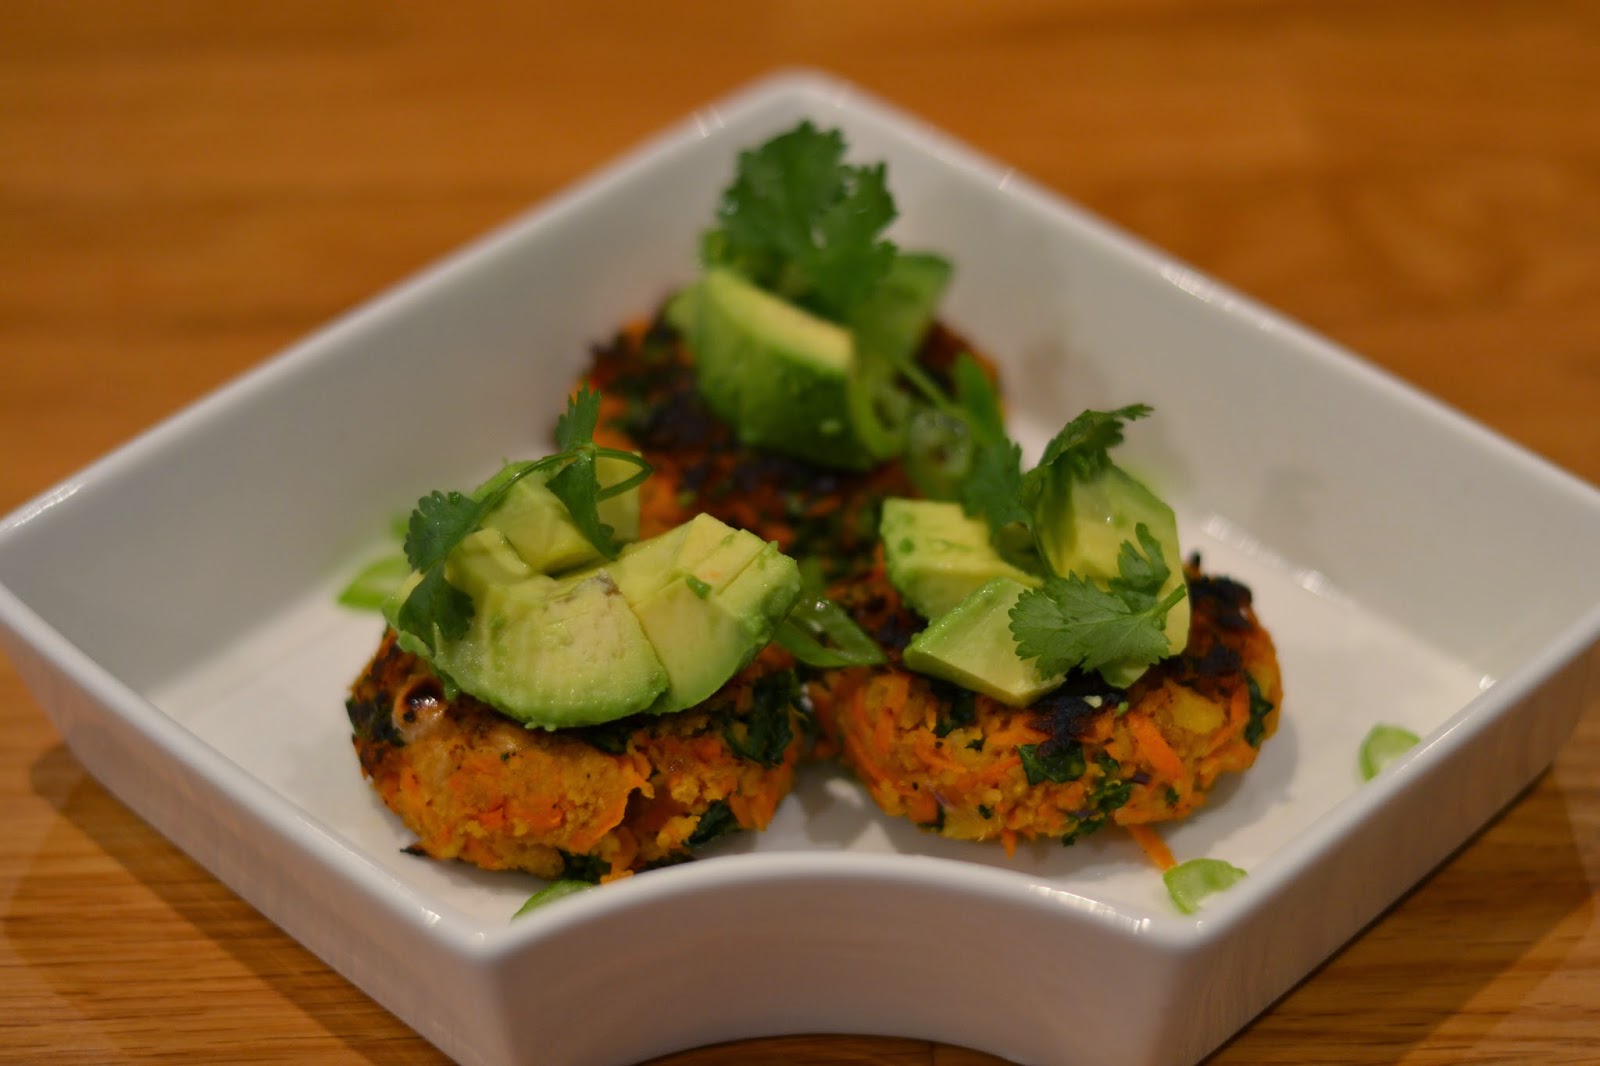
For a lighter meal but still satisfying and packed with nutrients, this veggie version of a crab cake is super easy, tasty and healthy.  Serve it up with your favourite condiment, salad, salsa, or even as a patty in a bun or wrap.  Tonight we had them with diced avocados then topped with a spoonful of peanut sauce.
topped with peanut sauce
what you need:
*makes about 8 cakes (~1" thick and 3" diameter)

  • 1 cup chick peas (fully cooked, you can use canned)
  • 1 cup (packed) finely chopped kale 
  • 2 medium carrots (peeled and grated)
  • 2 gloves of garlic, grated
  • 1/4 cup grated red onion
  • 1 large egg
  • 1 tbsp sea salt
  • 1/4 cup whole wheat panko (or any other bread crumb)
  • freshly ground black pepper
  • red chilli (optional) - finely chopped
  • 2-4 tbsp grape seed oil
  • 1 green onion, sliced thinly on an angle for garnish
  • excess carrot juice!
  • 1 few sprigs of fresh cilantro, roughly torn for garnish
what to do:
  1. Place grated carrots in a colander and sprinkle with 1 tbsp salt.  Lightly toss and then set over a large bowl and allow carrots to sit with the salt for about 30 minutes.  This step is important to draw out excess moisture in the carrots, to ensure your cake doesn't fall apart when frying.
  2. In a food processor or blender, puree chick peas roughly.  Leaving a few chunks will provide some texture to your cakes.
  3. Put kale, chick peas, red onion, garlic, egg, and red chilli in a large bowl.
  4. Squeeze excess liquid from grated carrots using your hands - this will also remove the most of the salt.
  5. Add carrots to the large bowl containing the rest of the ingredients and use your hands to mix, add panko and black pepper and continue to work the mixture until it comes together and you feel like it can be formed into cakes. 
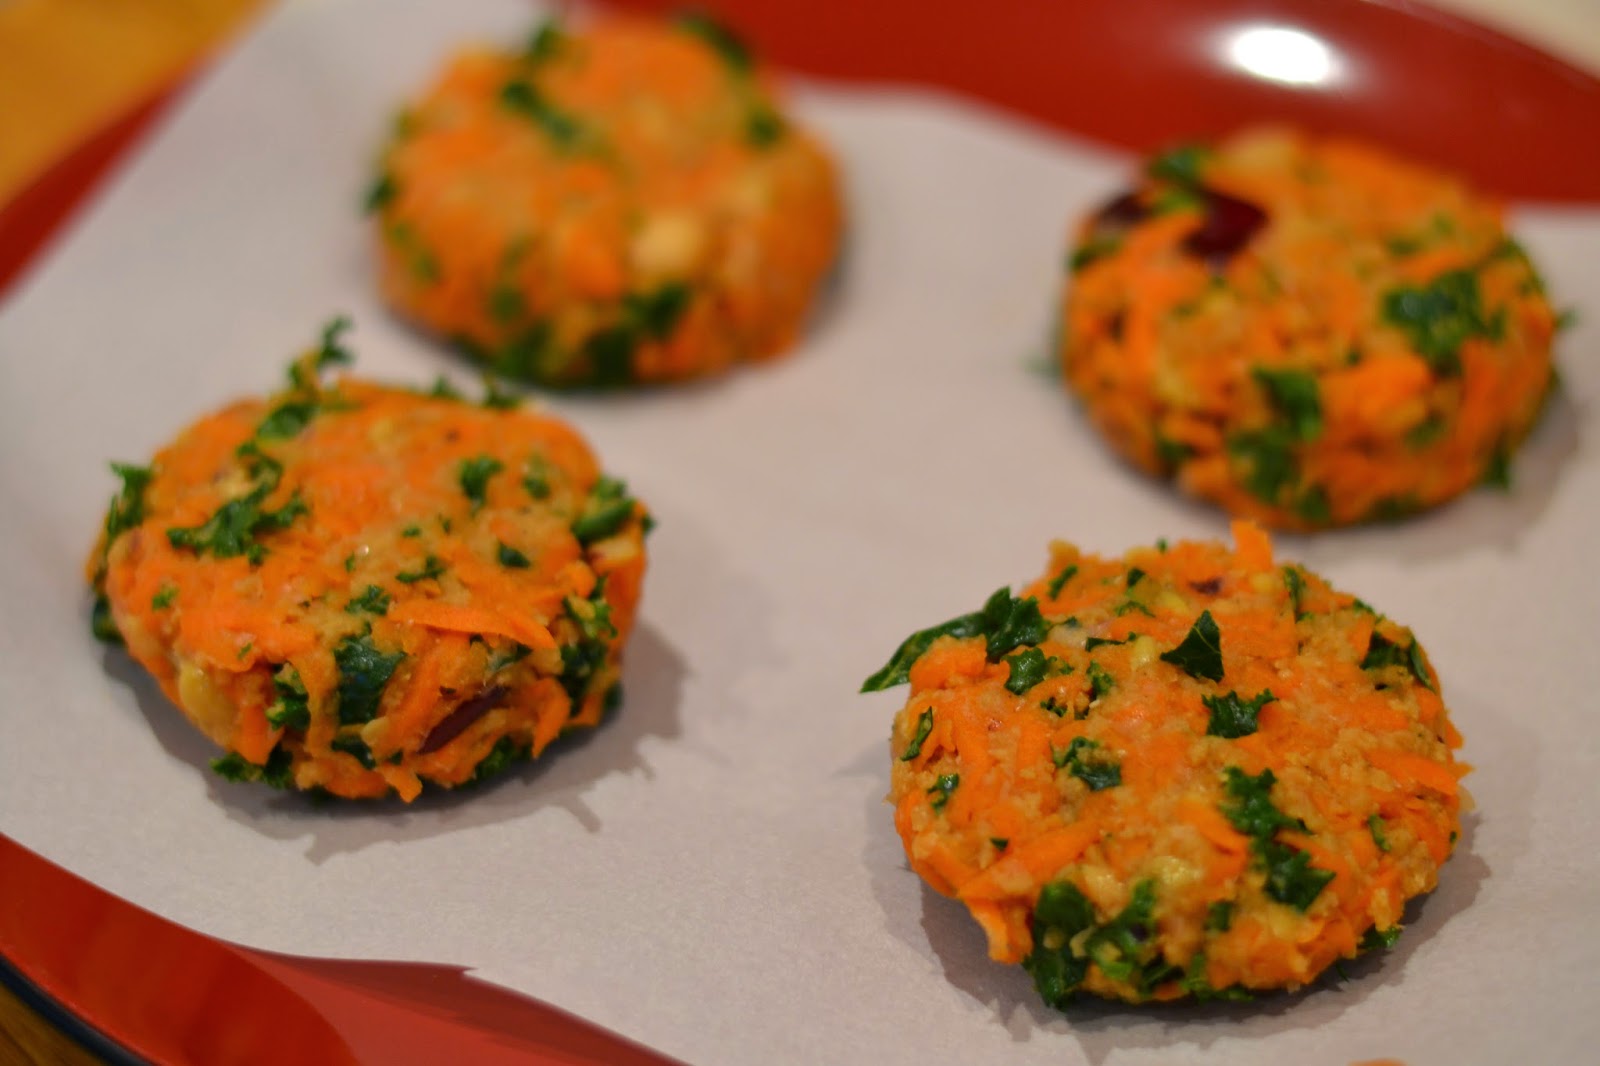
  6. Form cakes and place on a tray lined with parchment paper.  Refrigerate for at least 45 min (this allows your cakes to set so they don't fall apart when frying).
    ready for the fridge
  7. Heat a non-stick pan on medium with 2 tbsp oil.  Once they oil is hot, carefully place cakes and fry, about 3-5 minutes per side or until a golden crust forms.  You may need to add oil when you turn them over, if your pan seems too dry.
    after flipping these I added more oil
  8. Remove and place onto serving dish, sprinkle green onion and cilantro over top.  Serve with your choice of topping (we had avocado and peanut sauce while our 2 year old daughter chose ketchup).  Enjoy!

Thursday, October 16, 2014

"mochi" - sticky rice squares with red bean

a crunchy and chewy treat
If you've never tried "mochi" you have to try this!  You may have heard of ice cream mochi which is really popular right now - ice cream encapsulated by a chewy sticky rice exterior - but traditionally this Taiwanese snack is filled with red bean paste or sugared crushed peanuts.  The original mochi is steamed, therefore has a soft exterior; my mom has been making this baked version for as long as I can remember.  The baking creates a crunchy exterior which is a pleasant textural contrast to the sticky gooey inside.  The red bean paste has a subtle sweetness that will satisfy any sweet tooth without being cloyingly sweet.  Serving it warm minutes right out of the oven is the best way to enjoy it, but like any dessert, it's still delicious the next day!

I also realized today that this is a gluten and dairy free recipe.  Another popular trend!

Not a fan of beans?  Or you don't have red beans?  You can easily substitute something else such as jam, chocolate hazelnut spread, or even a cheesecake type filling.

what you need:
*for a 9 x 13" baking pan
  • 400 g (1 pkg) glutinous rice flour 
  • 2 eggs
  • 3 tsp baking powder
  • 1 pinch of salt
  • 3/4 cup sugar
  • 2 cups milk (I used unsweetened almond milk)
  • 2/3 cup vegetable oil (mild tasting such as grape seed or canola)
  • 2 cups red bean paste (purchased or make your own, see below)
this is a 8 x 8" square pan, recipe was halved
what to do:
  1. Preheat oven to 375 F.  Line baking pan with parchment paper or grease generously with butter for easy removal later.
  2. In a mixer, combine flour, baking powder, salt, and sugar.
  3. On low speed, slowly mix in eggs, milk and oil.  Mix until a smooth batter forms.
  4. Pour half the batter into the pan (it will seem like a thin layer).  Drop spoonfuls of red bean filling into the batter - try to make it evenly distributed but it doesn't have to be perfect.  Pour the rest of the batter on top and try your best to cover all of the filling.
  5. Bake for 45 min - 1 hr, until golden brown on top and a toothpick comes out clean.  If a toothpick comes out clean but your top is not browned yet, just switch your oven to broil for a minute to get your crunchy golden brown top.  
  6. Remove and cool for a few minutes - cut into squares while warm and enjoy!

Making your own red bean paste:

what you need:
  • dried red beans
  • water
  • sugar
  • brown sugar
what to do:
  1. Rinse 1 cup of red beans thoroughly.  Put beans into a small pot with enough water to generously cover them.  Bring to a boil then remove from heat and drain.
  2. Using the same pot, add fresh water just until beans are covered - bring to a boil and then turn down to simmer.  The beans will take awhile to cook until tender (about 20 - 30 minutes) - but make sure you check on them to prevent the bottom from burning.
  3. Once the beans are tender, add 2 tbsp brown sugar.  You can add more or less according to how sweet you would like your filling.  Taste and adjust accordingly.
  4. Turn off the heat and using a fork, gently mash the beans slightly.  It might seem like a lot of liquid but once the filling cools it will thicken.  You can store this in an airtight container in the fridge for several days.

Friday, August 1, 2014

apple & peach caramel pizza

a satisfying end to a homemade pizza dinner
My brother in law and his wife came for a visit last night and we had a great time in the kitchen making thin crust pizzas for dinner.  We saved the last piece of dough for dessert - and topped it with apples, peaches, and a homemade caramel sauce.  Absolutely one of the easiest desserts to make, and a very satisfying sweet end to any meal.

what you need:
  • thin crust pizza dough
  • 2 peaches
  • 2 apples (something firm like empire or granny smith is best, but any kind will do)
  • 1/2 tsp pure vanilla extract
  • 1 tsp cinnamon
  • 1/2 cup whole rolled oats
  • 2 tbsp coconut sugar or brown sugar
  • 1 heaping tbsp coconut oil or butter
  • caramel sauce (homemade best!)
    • 1 cup sugar
    • 1/4 cup water
    • 3/4 cup 10% cream
    • 3 tbsp butter
    • 1 tsp sea salt
what to do:
caramel sauce
  1. In a sauce pan on medium low, put in 1/4 water.  Add sugar to the centre of the pan, making a small hill.  Do not stir.
  2. Sugar will begin to dissolve, you can swirl the pan gently but do not stir.  Keep an eye on it until it turns golden - about 8 minutes - then remove from heat immediately to avoid burning.
  3. Add cream (it will bubble) - swirl it around, then add butter.  Sprinkle sea salt and swirl.  You can use a wooden spoon to stir gently at this point.
  4. Once the caramel is cool enough, transfer to a mason jar (or other jar for storing).
the pizza
  1. Cut thoroughly washed apples and peaches into bite size pieces.
  2. In a pan (you can use the same one as the caramel sauce - less dishwashing!) - add the fruit and then place it over medium heat.  Cook fruit for about 10 minutes, just until slightly tender (but not mushy).  Add vanilla and stir.  The fruit can be made ahead of time and used when you're ready to serve.
  3. With a fork, roughly mix oatmeal, sugar and coconut oil until crumbly.
  4. Preheat oven to 425 F.  Use a pizza stone if you have one (otherwise, just place pizza on baking sheet).  Roll out dough, then top with fruit mixture.  Spoon caramel sauce generously over fruit and around the pizza crust edges, then sprinkle all over with oatmeal crumble.
  5. Bake for about 8-10 minutes, until crust is lightly golden.  Serve hot, topped with something cold like vanilla ice cream, frozen yogurt or even greek yogurt. Enjoy! 

Sunday, April 6, 2014

"sugar" free banana blueberry muffins

sweetened with coconut sugar and maple syrup
Recently I have been trying out substitutes for the usual refined sugars (granulated sugar, brown sugar) and have found that baking with honey, maple syrup, organic coconut sugar, and turbinado sugar taste pretty great.  These blueberry banana muffins are adapted from a recipe I found from Looney Spoons , and they are super soft and moist with a nice crunch on top without having to use refined sugars.  You can feel good about giving these to your little ones - Madi (who's almost 2 now!) couldn't wait to try them.  She ate one straight out of the oven as I gingerly cut them with a knife and we blew on each piece to cool it down for her to eat!  She asked for seconds and got them:)

what you need:
*makes a baker's dozen

  • 1/2 cup flour
  • 1/2 cup whole wheat flour
  • 1 cup rolled oats
  • 1 tsp baking soda
  • 1 1/2 tsp baking powder
  • 1/2 tsp fine sea salt
  • 2 heaping table spoons ground golden flax seed
  • 1 egg
  • 1 cup frozen wild blueberries
  • 3 large bananas, very ripe
  • 1/4 vegetable oil (I used grape seed oil)
  • 1/2 cup organic coconut sugar
  • 3 tablespoons pure maple syrup
  • 1 tsp vanilla
what to do:
  1. Preheat oven to 375 F.  Line a muffin tin with large muffin cups.
  2. In a medium bowl, mix flours, oats, baking soda, baking powder, coconut sugar, salt and flax seed.  You can just use a large fork.
  3. In a large bowl, mash bananas well, then mix in oil, egg, vanilla, and maple syrup.  Again, a large fork will do.  (If you use electric beaters be careful not to over mix).
  4. Add flour mixture to banana mixture.  Combine with a spatula just until batter is evenly mixed.
  5. Add blueberries and fold them in gently with the spatula.
  6. Fill the muffin cups evenly, almost to the top.  Bake for 20 minutes, the tops will be golden brown and a toothpick will come out clean.  When cool enough to handle, move muffins to cooling rack.  Enjoy!


Saturday, February 1, 2014

indian spiced roasted cauliflower

tender and flavourful
I feel that cauliflower is a vegetable that doesn't get much attention; I don't tend to buy it very much but when I do and prepare it in this way, I remember how much I enjoy it's taste and texture. This easy side dish is a perfect compliment alongside basmati rice and other Indian or Asian inspired dishes.  Use the whole cauliflower as left overs are great for the next day.

what you need:
  • 1 whole head of cauliflower
  • 1 tsp whole mustard seeds
  • 1 1/2 tsp ground turmeric
  • 1/2 tsp ground cumin
  • 1/2 tsp salt
  • 2 garlic cloves, roughly chopped.
  • 1 tsp red chilli flakes *optional*
  • freshly ground black pepper
  • 1 tbsp butter
  • 1 tbsp grape seed oil
what to do:
  1. Clean and cut cauliflower into small bite size florets.
  2. Preheat oven to 400 F.
  3. In a large dutch oven* on medium heat, melt butter with grape seed oil.  Toast mustard seeds in oil, about 1-2 minutes.  They will become fragrant.  Add garlic, turmeric, cumin, and chilli flakes and stir to avoid burning. 
  4. Add the cut up cauliflower once you smell the spices.  Stir to coat all florets with spices. Add salt and pepper.
  5. Cover the dutch oven with the lid, then transfer to the oven.  Roast for about 15 minutes, until fork tender (but not mushy).
  6. Serve hot and enjoy!
*If you don't have a dutch oven, do this step in a regular frying pan.  Line a baking sheet with aluminum foil.  After step 4, transfer florets to the baking sheet and roast.  You will have a slightly nuttier flavour on the cauliflower and some bits of crunch, which is also really tasty.
tossed with spices on the stove before hitting the hot oven

Sunday, January 19, 2014

gluten free peanut butter cookies


You can feel good about making these cookies for your little ones because they don't have any butter or refined sugar in them!  The use of brown rice flour as the base makes them gluten free as well.  The chocolate chips are optional for a sweeter treat but you can easily substitute raisins for a healthier version.  These cookies are super easy to make and bake up within minutes.

what you need:
*makes about 20 cookies

  • 1 cup brown rice flour
  • 1/4 cup finely ground almonds
  • 3/4 cup all natural peanut butter
  • 3/4 cup honey
  • 1 tsp baking soda
  • 1/4 tsp salt
  • 1 egg
  • 1/2 cup dark chocolate chips or raisins
what to do:
  1. Preheat oven to 350 F.  Line cookie sheets with parchment paper.
  2. Mix honey and peanut butter in a large bowl, then add egg and mix until smooth.
  3. Combine dry ingredients in a separate bowl and mix well.
  4. Pour dry ingredients into peanut butter mixture, and stir just until combined. Do not over mix.  Fold in chocolate chips.
  5. Using two spoons, drop golf ball sizes of dough onto lined cookie sheet - around 8 per sheet.  Bake for 8-10 min. Cool cookies on cooking rack once done.  Enjoy!

peanut enjoying her cookies


Thursday, October 17, 2013

creamy tomato & white bean soup with herb & parmesan croutons

crispy croutons in a smooth soupy bite
Who doesn't love grilled cheese & tomato soup?  This recipe unites this classic into one bowl and one bite.  The soup has more body because I've added white kidney beans, which adds a very mild flavour once pureed but doesn't disturb the tomato yumminess of a creamy tomato soup. The addition of beans makes the soup meal-like, as they are a great source of protein and fibre. The homemade croutons are a perfect touch to add texture and flavour, as they are tossed in herbs, olive oil and parmesan.  A perfect meal for a cold fall day.

what you need:
  • 1 large can tomatoes (no salt added)
  • 1 540 mL can white beans, drained (kidney or cannellini) 
  • 1 medium yellow onion, diced
  • 1 bay leaf
  • 1 tbsp butter
  • 1/4 cup cream *optional* 
  • 1 red chilli, thinly sliced *optional*
  • 1 green onion
  • a few slices of day old bread (I used whole wheat)
  • fresh herbs (whatever you have on hand, I used sage, oregano, parsley)
  • parmesan cheese
  • olive oil
  • salt and pepper to taste
what to do:
  1. In a large pot, heat up butter and 1 tsp olive oil on medium heat.  Add onions and sauté until tender and golden.  If you like some heat in your soup, add the red chilli and sauté with onions.
  2. Add tomatoes and beans.  Add bay leaf.
  3. Bring to a gentle boil then turn down your heat down to simmer for about 20-30 minutes.
  4. Preheat oven to 375 F.
  5. Cut bread into bite size pieces.  Finely chop herbs, about 1 tbsp of each.  Place them in a large bowl, then drizzle about 1 tbsp olive oil over bread pieces.  Toss to coat and mix herbs.  Season lightly with salt and pepper.  Thinly slice green onion and set aside.
  6. Line a baking sheet with parchment paper.  Spread bread pieces out - no overlapping for even browning.  Grate parmesan cheese over top of bread.
  7. Bake in the middle rack of the oven for about 5 minutes, or until croutons are crispy and golden brown.  Be sure to check often to avoid burning.
  8. Remove soup from heat and when cool enough to handle, use an immersion blender or a blender to puree the soup until smooth.  Pour soup back into the pot and place it over medium heat, adding cream if desired.  Taste, and add salt and pepper as desired.
  9. Serve soup hot, sprinkle a few green onions on top and then top with a few croutons.  Put extra croutons in a separate small bowl for extra dipping (this way they don't all get soggy right away!) - Enjoy!

Sunday, October 6, 2013

mah jong mien (aka peanut butter noodles)

a light meal that is rich in flavour
I have no idea why this is called Mah Jong Mien in Taiwan, as it has nothing to do with the game of tiles, but it has been a staple go to meal growing up in our household.  My mom is the queen of putting together a healthy home cooked meal in minutes from items found in her pantry and fridge, and this peanut butter noodle dish is just one of those.  I think we ate this as kids weekly - and still do whenever we are home to visit.  My mom's version is even simpler - she mixes peanut butter, soy sauce, rice wine vinegar, and garlic together in a bowl until smooth then tosses it with the noodles and vegetables.  It's super easy and tasty.  Below is my take on our family staple.

what you need:
for the peanut sauce
  • 2 heaping tbsp natural peanut butter
  • 2 tbsp naturally brewed soy sauce
  • 1 tbsp rice wine vinegar
  • 2 slices fresh ginger
  • 1 large garlic clove
  • 2 green onions
  • 1/2 cup cold water
  • 1/2 tsp sesame oil
  • 1 tbsp grapeseed oil (or vegetable oil)
  • 1 tsp white pepper 
for the noodles
  • 4 servings of any dry asian noodle, you can even use pasta (e.g. linguine)
  • 2 medium carrots
  • 1 handful fresh cilantro
  • a small bunch broccolini (or broccoli) 
what to do:
  1. Start by getting your sauce ready.  Thinly slice ginger and roughly chop garlic.  Cut off bottom white part of green onions (about 2 inches) and slice lengthwise.  Get the rest of the ingredients for the sauce measured and ready on hand.
  2. In a small sauce pan on medium, heat up grapeseed and sesame oil.  Add ginger, garlic, and onions.  Sauté for about 1 min, then deglaze with the water.  Add soy sauce, peanut butter, vinegar, and white pepper.  Stir until peanut butter dissolves, and reduce heat down to a simmer.  Allow it to reduce to about half.
    garlic, onions, and ginger sautéing
    reducing sauce
  3. Get a large pot of water on the stove on high heat to cook the noodles.
  4. While waiting for the pot to boil, clean and prepare vegetables.  Peel and grate the carrots, and slice broccoli into long slim pieces.  Slice remaining green onion on a bias and roughly tear cilantro.  
  5. Once the water is boiling, add noodles.  Depending on what kind of noodles you are using, your cooking time will vary.  Whatever your package indicates, set your timer for 1 minute shy of it's cooking time.  This is because you want to put the vegetables in with the noodles to cook for 1 minute.  
  6. Drain noodles and vegetables, reserving about 1 cup of the cooking liquid.
  7. Return noodles and vegetables to pot and pour reduced peanut sauce over noodles and toss.  You may need to add a little bit of the cooking liquid if the noodles seem too dry.  Toss in some of your cilantro and green onions, but reserve a small amount for garnish.
  8. Transfer noodles to serving platter and top with cilantro and green onion for garnish.  Serve with your favourite hot sauce if desired - we used sriracha.  Enjoy!
with sriracha

Sunday, September 22, 2013

banana pear & oatmeal muffins


These muffins are a great morning treat or snack, as they are packed with fruit and rolled oats!  The grated pears and banana help keep the muffins moist so you don't have to use very much oil, and the natural sweetness of the fruits allows you to cut down on the use of refined sugar.  Madi (my one year old) loves these and gobbles them right up.

what you need:
*best if everything is at room temperature
**makes 24 medium sized muffins
  • 1 cup whole wheat flour
  • 1/2 cup all purpose flour
  • 1 cup rolled oats (I used 1 min quick cooking rolled oats)
  • 1 tsp baking soda
  • 2 tsp baking powder
  • 1/2 tsp salt
  • 1 tsp cinnamon
  • 2 tbsp vegetable oil
  • 2 large bananas, mashed well
  • 1-2 pears (to get 1/2 cup grated pear)
  • 1/4 cup sugar, + 2 tbsp sugar
  • 2 eggs
  • 3/4 cup milk
what to do:
  1. Preheat oven to 400 F.
  2. Combine flours, rolled oats, baking soda, baking powder, salt, cinnamon, and 1/4 cup sugar together in a bowl. Stir to combine. 
  3. In a mixer (or with electric hand beaters), beat eggs and 2 tbsp sugar until light and airy, about 2 minutes.  Add milk, oil, grated pear, and mashed bananas.  Add dry ingredients and mix just until incorporated (do not overmix or muffins will be dense).
  4. Line 2 muffin tins with medium cups.  Fill with batter and then bake for 10 min, or until very lightly golden on top and toothpick comes out clean.
  5. Remove and cool when ready to handle on cooling rack.  Once at room temperature, store in air tight container.  Enjoy!

Monday, July 29, 2013

meatless "antipasto" platter

perfect for sharing
serve with homemade pita bread
This meal is perfect for a night in with friends or a date night.  Lots of tasty bites to share, and all even better with a glass of wine.

Before I made this I had only tried artichokes in their jarred form, or on top of pizza or in a salad at restaurants.  The fresh green ones at the grocery store have always intrigued me, and I've seen how they are cooked on foodnetwork, but never tried it.  I decided to go for it and it was definitely worth the effort.  It was a perfect on this "antipasto" platter - quotations because it's not the traditional italian kind with cured meats and pickled veggies etc.  Each component on the platter takes a bit of time to prepare, but you can multitask and enjoy wine while doing it!

what you need:
  • 1 medium sweet vidalia onion
  • 1 red bell pepper
  • 1 head of garlic
  • fresh pita bread (check out my homemade pita recipe)
  • 1-2 artichokes
  • 1 small package of king oyster mushrooms
  • assorted cheeses of your choice (I used some feta, sharp cheddar, and parmesan)
  • pita bread
artichoke dipping sauce 
(mix all ingredients together and refrigerate until ready to enjoy)
  • 1/3 cup mayonnaise (low fat is OK)
  • 1 garlic clove, finely grated
  • 1 lemon's zest and juice
  • salt and pepper

what to do:


caramelized onion

1. Thinly slice onion.
2. In a non-stick pan, melt 1 tbsp butter + 1 tsp olive oil over medium heat.
3. Add sliced onions and turn heat down to medium low.  Caramelized onions take a long time but it's the slow cooking process that draws out the onions sweetness.  You don't want the heat too high or you will just get browning.
4. Continue stirring and checking on your onions as you work on other parts of this platter.  Once the onions are very soft, sticky, and very lightly browned, they are done.

roasted red pepper

  1. If you have a gas range, fire it up and put the red bell pepper directly on the flame, blackening all sides and softening the pepper.  Otherwise, preheat oven to 425 F and roast pepper whole in the oven for 20-30 minutes.  Either method, you know the pepper is ready when it is soft and squishy...be careful it may squirt very hot liquid!
  2. Place cooked pepper in a bowl and cover with plastic wrap.  
  3. Once it is cool enough to handle, remove blackened skin (should slide off easily) - slice thinly and toss with 1 tsp of extra virgin olive oil, pinch of salt and freshly ground pepper.  
blistering on the flames
covered by plastic wrap to steam, then cool
 artichokes
  1. Get a large pot of water boiling.
  2. Wash artichokes by rinsing in cold water, then cut about 1 cm off each end.
  3. Use kitchen scissors to cut tips of each leaf (this gets rid of any potential pointy parts).
  4. Cut a lemon in half and rub all over artichoke to keep it nice and green.
  5. Immerse artichokes in boiling water and cover, turn heat down to medium and cook for 30-40 minutes (bigger artichokes will need more time).
  6. Get an ice bath ready (lots of ice with cold water in a large bowl)
  7. When the artichokes are cooked, drain and immediately immerse in ice bath.
  8. Once cooled, remove and allow artichokes to drain/dry on a cooling rack or paper towels.
trimmed and leaves cut, ready for boiling
draining water out
roasted mushrooms & garlic

1. Preheat oven to 400 F.
2. Cut king oyster mushrooms length wise, about 0.5 cm thick.
3.  Toss mushrooms with 1 tbsp melted butter, a pinch of salt and pepper.
4. Line a baking tray with parchment paper and place mushroom slices on, do not overlap.
5. Cut off tip of garlic head, about 0.5cm, to expose tops of cloves.
6. Drizzle top with a little bit of olive oil and sprinkle with salt and pepper.
7. Wrap tightly in foil and place on corner of baking tray, alongside mushrooms.
8. Check at 10 minutes to see if mushrooms need a flip.
9. Roast for about 15-20 minutes, until garlic is soft and mushes easily, and mushrooms are soft and slightly golden brown.

feast!

Wednesday, July 10, 2013

"spaghetti" pizza parcels

these little parcels are easy to eat,
leftovers make a great lunch!
These were inspired by my 11 month old daughter, Madi. She is not the best little eater so meal time is quite the challenge! However, recently we have found that she really loves black beans, and all kids seem to love tomato pasta sauce.  With lean ground beef, tender veggies and a cheesy topping, this combination is definitely a hit. This little parcel uses the same dough as the thin crust pizza.  You can eliminate the beef to make this a vegetarian dish.

what you need:
*makes 18 

  • 1 can black beans (540 mL)
  • 1 can diced tomatoes (~400 mL)
  • 2 tbsp tomato paste
  • 2 large garlic cloves
  • 1 medium yellow onion
  • 1 large carrot
  • 2 celery ribs
  • 450 g lean ground beef
  • 1 tbsp chopped fresh oregano
  • salt and pepper
  • 1 tbsp olive oil
  • 1 cup shredded sharp old cheddar
  • 1 egg 
  • 1/3 cup flour 
  • 3 thin crust pizza doughs (if they were made ahead and frozen, take them out to thaw while you make the filling)
what to do:

filling
  1. Prepare veggies (celery, onion, carrot) - wash thoroughly, remove peel from onion and carrot, then dice into small cubes.  Set aside in a bowl.
  2. In a large pot over medium heat, warm olive oil then add diced onion, carrot and celery.  Sauté for 5-10 minutes, stirring often and allowing veggies to soften and lightly brown.
  3. Finely chop garlic and add to the pot, sauté for another minute.
  4. Add ground beef, breaking up into small pieces with a wooden spoon.  Continue sautéing and stirring, about 5 minutes.  Season with salt (~1/2 tsp) and freshly ground black pepper.
  5. Drain and rinse black beans.
  6. Add diced tomatoes, black beans, tomato paste and oregano.  Stir to mix evenly, then put lid over pot and turn heat down to medium-low.  
  7. Allow this to simmer for 45 minutes, occasionally mixing and checking to avoid burning at the bottom.  
  8. After 45 minutes, lift lid and simmer for another 5 minutes.  Excess liquid will evaporate and allow filling to thicken so that the pizza parcels won't be soggy.  Transfer to bowl to cool to room temperature.
pizza parcel assembly
  1. Preheat oven to 400 F.
  2. Line two baking sheets with parchment paper.  
  3. Crack egg into a small bowl and beat with a fork.  Get cheddar cheese ready.
  4. While filling is cooling, sprinkle work surface generously with flour (to avoid dough sticking).  Roll out pizza dough until quite thin and somewhat rectangular in shape (doesn't have to be perfect).  Cut into 6 even-ish squares.  
  5. Spoon about 2 tbsp into the centre of the squares, then pull up all four corners and pinch together.    It's ok if the filling is not completely sealed by the dough.  Transfer parcel onto baking sheet.
  6. Once 6 are on the baking sheet, lightly brush tops of parcel with egg wash and then top with shredded cheese (about 1 tbsp).  
  7. Place in oven centre rack, bake for 13 minutes, until tops are golden brown.  Remove and allow to cool slightly before serving.  Enjoy!

Tuesday, May 28, 2013

cali in a bowl

perfect for summer
This salad is inspired by Californian fruits and the very popular creamy poppy seed dressing.  I couldn't find poppy seeds in my grocery run today so I substituted with black sesame seeds.  It added the same texture as poppy seeds would and you wouldn't even know the difference because the flavour is so mild.  We will definitely be making this salad all summer long - it'll be even better when the local strawberries are available.

what you need:
for vinaigrette
  • 1 lemon (juice and zest finely grated)
  • 1/4 cup canola oil
  • 3 tbsp red wine vinegar
  • 2 tbsp honey
  • freshly ground black pepper, pinch of salt
  • 1/2 shallot
  • 1 heaping tbsp poppy seeds or black sesame seeds
  • 1 avocado
  • baby spinach 
  • 1 mandarin orange
  • 8-10 strawberries
what to do:
  1. Blend all vinaigrette ingredients (except for seeds) together until smooth.  Add seeds.  Store in a mason jar in the fridge.
  2. Prepare strawberries by washing, removing tops and slicing into bite size pieces.  
  3. Prepare mandarin orange by peeling and removing extra bits of white pith.  Break into individual wedges and cut them in half.  This might seem like an extra step but it's worth it to remove any unwanted seeds and also allow the orange juices to flow into the salad.
  4. Toss strawberries and oranges slices together in a salad bowl.  When ready to serve, toss with desired amount of baby spinach and vinaigrette (unused portion of the vinaigrette can be stored in the fridge for up to 5 days).  Top salad with slices of avocado.  Enjoy!

tonight we had our cali salad with tilapia & ginger pickled radish

Tuesday, May 7, 2013

pita

fresh homemade pitas topped with old cheddar
These pitas are perfect for dips & wraps and have a pleasant chewy and soft texture.  This recipe is exactly the same as the thin crust pizza one - the only difference is keeping the dough slightly thicker when rolling it out and brushing the top lightly with olive oil (flavoured is a great option!), your favourite herbs and/or cheese.  Bake them at 425 F on a pizza stone or a cookie sheet for 8-10 minutes until puffed up and very lightly golden browned - too long in the oven will make them crispy rather than soft.  Enjoy!
divided into 8 balls
cover with a damp tea towel and allow to rise in a warm place
dough after rising for the second time

Sunday, April 14, 2013

avocado toast

a quick nutritious snack
I almost didn't post this because it's embarrassingly easy...but its so delicious and good that I had to share!  The creamy avocado and the combination of sweet and salty make this piece of toast very satisfying.

what you need:
  • multigrain bread (my favourite for this is Bavarian multigrain)
  • 1/2 avocado
  • lemon
  • freshly grated black pepper
  • sea salt (or regular salt)
  • honey (~ 1 tsp)
what to do:
  1. Pop the toast in the toaster.  While it's toasting, cut avocado in half, squeeze a little bit of fresh lemon juice on flesh to prevent browning.  Spoon avocado out onto toast, and gently press to spread it.  Drizzle honey on top, and finish with pinch of sea salt and lots of pepper.  Enjoy!

Thursday, April 4, 2013

tilapia red thai curry

soul warming
I'm a big fan of all curries but my favourite go to is the red thai curry.  The tilapia held up really well in the sauce and soaks up the curry flavour beautifully.

what you need:
*serves 4
  • 500 g tilapia
  • 3 tbsp red thai curry paste (I've used Mae ploy and Aroy-D brands, both good!)
  • 1 sweet potato
  • 2 carrots
  • 1 onion
  • 3 cloves garlic
  • juice of 1 lime OR 1 tbsp rice wine vinegar
  • 2 tbsp brown sugar
  • 1 tbsp naturally brewed soy sauce
  • 240 mL coconut milk 
  • 2 tbsp canola oil
  • 1 red thai chilli *optional
  • 1 green onion
  • 1 handful fresh cilantro
what to do:
  1. Clean vegetables, peel, then dice into bite size pieces.  Roughly chop garlic.  Separate cilantro stems from leaves.  Finely slice green onion and keep it aside with the cilantro leaves for garnish later.  Finely slice red thai chilli (for less heat -  leave it whole BUT be sure to take it out before serving!).
  2. Heat oil in a large pot on medium heat.  Add onions and red thai chilli and sauté for 2 minutes, then add garlic, carrots and sweet potato.  Stir, lightly browning, then add curry paste.
  3. After 1-2 minutes of sautéing with curry paste, add coconut milk.  Fill empty coconut milk can with cold water and add to pot.  Add sugar, lime juice, soy sauce and cilantro stems.  Stir, then cover tightly with lid.  Allow to simmer on medium low for 15 minutes.
  4. Cut tilapia into large chunks.  Season tilapia lightly with salt and freshly ground black pepper.  Add to pot and bring heat up to medium and allow fish to simmer with the curry sauce for 8 minutes.
  5. Once fish is cooked (white throughout) - curry is ready to be served.  Serve it over rice, and garnish with cilantro & green onions.  Enjoy!