Saturday, December 17, 2011

easy party treats

something for everyone

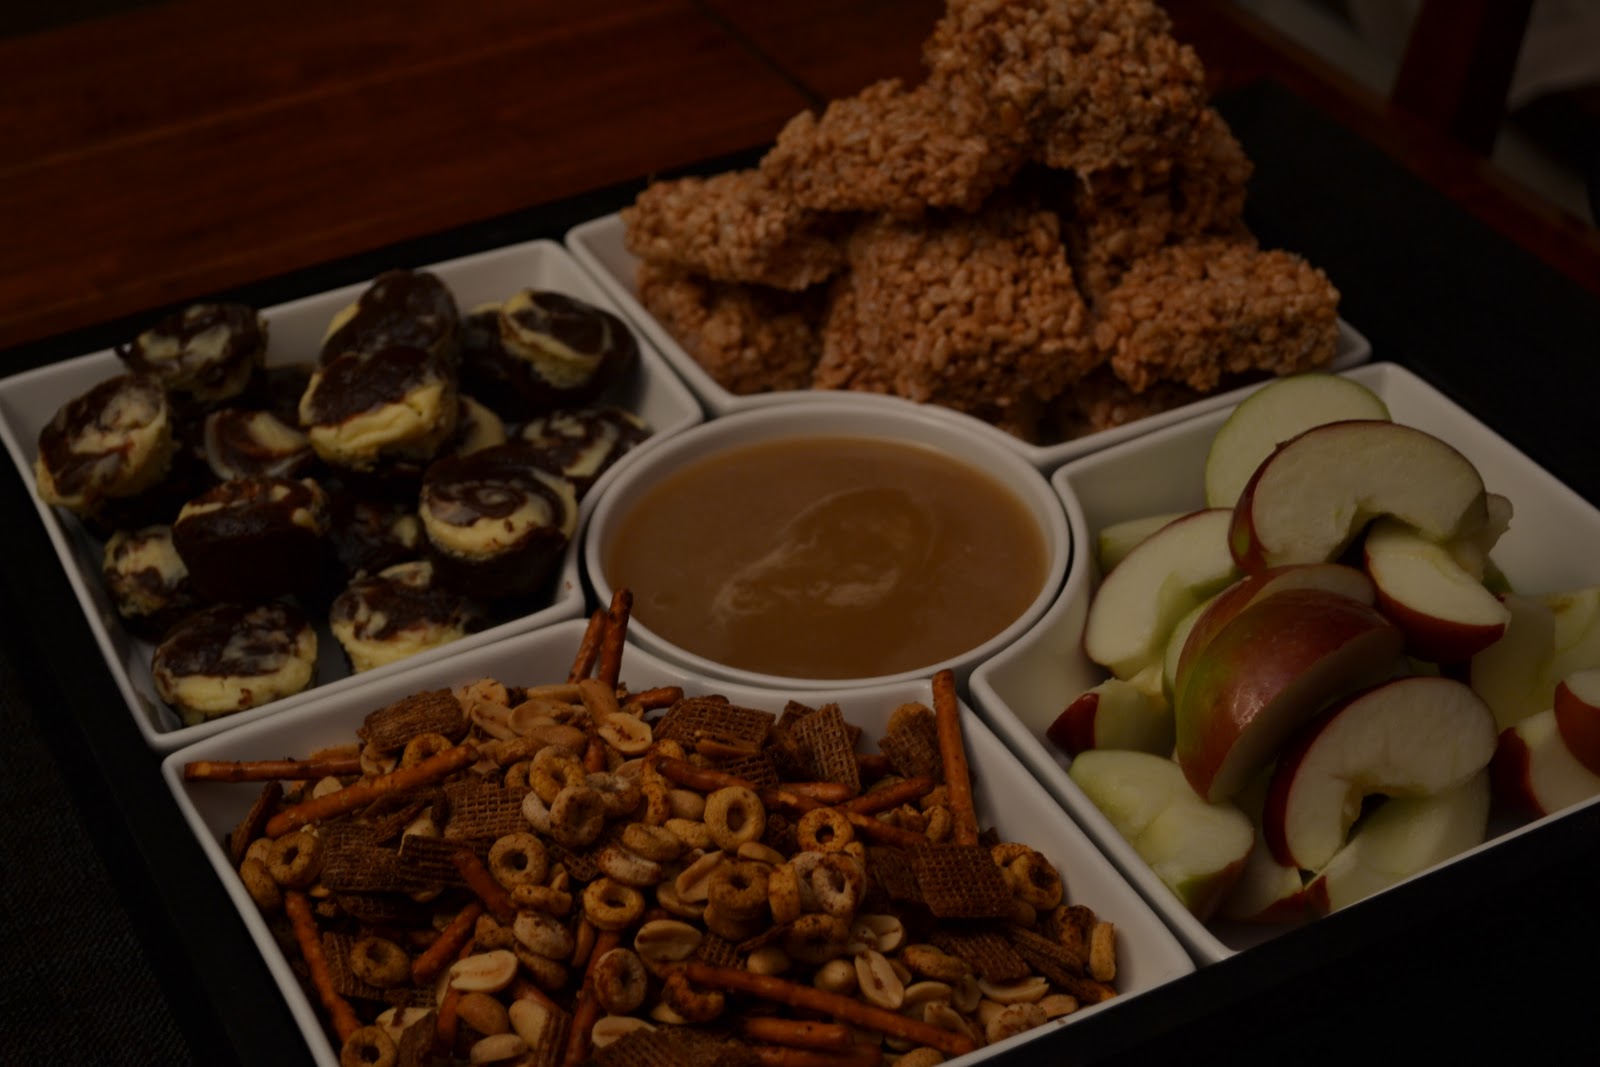
People always want different kinds of tastes - sweet like chocolate, caramel/candy, salty, and everyone loves rice crispy squares!  These party snacks are super easy and just take the original recipes to a new level.

mars bar rice crispy squares
I always save my baby spinach plastic containers...
so useful for storing things like this or transporting to another party!


what you need:
  • rice crispies
  • 2 mars bars, chopped into small cubes
  • marshmallows
  • 1/4 cup butter
  • 1 tsp vanilla extract
what to do:
  1. In a large pot, melt butter and then add marshmallows (about 250 g), stir and when the marshmallows are almost melted, add the vanilla and one mars bar.  
  2. Turn off heat and once mars bar is melted, add 6 cups of rice crispies.  Stir to coat with marshmallows, then add the remaining mars bar cubes.  These won't melt as much and will be a delicious chocolately/caramel surprise bite!

swirly cheesecake brownies
what you need:
  • your favourite brownie recipe ingredients
  • 1 package cream cheese, room temperature
  • 1 egg
  • 1/4 cup sugar
  • 1 tsp vanilla extract
what to do:
  1. Beat cream cheese with sugar until fluffy and smooth, then beat in the egg and vanilla extract.  Set aside.  Preheat oven to 375 F.
  2. Prepare your brownie batter.
  3. You can make the brownies in a large square pan or make mini-brownie bites as I did this time.  The second is more labour intensive.  Basically for both, you pour the brownie batter first into a well buttered pan, then pour the cheesecake mixture on top and swirl with a butter knife to get the marble effect.  When you make them into small individual brownies, you have to make sure you butter the mini-muffin tin really well and use a smaller tool (e.g. chopstick or toothpick) to swirl the brownie batter up into the cream cheese to get the marbling.                  
  4. For the large square, bake for about 40 minutes and check with a toothpick.  It depends on how gooey you like your brownies, but usually a little sticky residual batter on the toothpick means it`s ready.  If it`s clean it`s a more cakey texture...and if its super wet then its not done yet.
  5. For the mini-brownies, bake for 8 minutes then check with a toothpick.  It will probably take about 8-12 minutes, but keep checking because they are so small they will over bake quickly.
  6. Be sure to gingerly remove the mini-brownies after a minute from the pan to a cooling rack - you don`t want them to continue cooking in the pan.  Enjoy!

caramel dip

what you need:
  • 1/2 cup cold water
  • 3/4 cup sugar
  • 1/4 cup corn syrup
  • 1/2 whipping cream
  • 1 pinch of salt
what to do:
  1. In a small saucepan, add water and pour the sugar right in the middle.  Do not stir.  Place it on medium-high heat, and add the corn syrup.  Allow the mixture to bubble away, you can swirl the pan by holding the handle and gently swirling, but do not stir with a spoon or it will crystallize.
  2. Once the mixture becomes a dark golden brown, remove from heat and whisk in the cream.  Be careful as it will steam and bubble a little.  Add the salt.  The caramel will thicken once cooled.  Enjoy with any sliced fruit!
homemade bits and bites
I was inspired to make these after having some at my friend Hill`s.  So easy but such a crowd pleaser.

what you need:
  • 1 cup peanuts, unsalted
  • 1 cup pretzel sticks
  • 1 cup toasted O`s
  • 1 cup shreddies
  • you can add anything else you like...some people add the cereal corn bran, cheese nips, different nuts...
  • 1/4 cup unsalted butter
  • 1 tsp each of onion powder, garlic powder
  • 1 pinch black pepper
  • 1 tsp Worcestershire sauce
  • 1/2 tsp celery salt
  • a few dashes tobasco *optional
what to do:
  1. Preheat oven to 300 F.
  2. Melt butter in microwave and then mix in the spices.
  3. Combine peanuts, pretzels and cereals in a large bowl pour the butter and spice mix all over.  Toss a few times to coat the mixture as evenly as possible.  Transfer to a large baking dish or cookie sheet and place in the middle rack of the oven.  Bake for about 35-45 minutes, stirring every 10-15 minutes or so.
  4. Remove from oven and allow to cool to room temperature.  Enjoy!  It can also be stored in an airtight container for several days.

a christmas sweater party - holiday mojitos!

dodgeball boys
the girls
This weekend we hosted a Christmas sweater party for our dodgeball team.  It was a lot of fun and everyone had lots to eat and drink.  We had chicken lollipops, nachos with homemade mango salsa and guacamole, sausage rolls, sweets and holiday mojitos.  Super fun.

a festive cocktail
Holiday Mojito

what you need:
  • vodka
  • fresh cranberries
  • mint
  • sugar
  • water
  • club soda
  • ice
  • lime or lemon *optional
what to do:
  1. Make simple syrup by using equal parts sugar and water.  Bring to a boil and remove from heat and allow to cool to room temperature.
  2. In a mortar and pestle, grind up some cranberries, mint and 1 tsp sugar.  
  3. In a cocktail shaker, add some ice, the mashed up cranberries and mint, a splash of simple syrup, and cold water.  Shake and pour into a glass, then top it off with club soda and a squeeze of lime or lemon.  Enjoy!

Wednesday, November 23, 2011

easy glazed salmon

Ok this is actually the easiest thing to make and it's so good you'll want to make it every week!  Serve it with salad, steamed veggies, some rice or sweet potatoes...anything goes.

what you need:
*serves 2
  • 2 pieces fresh salmon
  • 1 tbsp grainy mustard
  • 1 tbsp brown sugar
  • salt and pepper
what to do:
  1. Preheat oven to 425 F.
  2. Pat salmon lightly with paper towel.  Season with salt and pepper.  Mix mustard and brown sugar well, then even coat the top of the salmon pieces.  
  3. Place salmon skin side down on baking dish generously lined with aluminum foil and fold opposite corners of the aluminum a little bit to cover salmon (but don't let it touch the mustard mixture).  Bake in middle rack for about 12-15 minutes or longer, depending on the size of your fish and how well done you like it.
  4. For the last minute or two, open the foil up to expose salmon and turn the oven to broil and watch carefully to avoid burning.  It is done once the sugar caramelizes slightly and is bubbling a little.
  5. Remove from oven and allow to cool a few minutes.  The salmon should come away easily from it's skin.  Serve immediately and enjoy!

Sunday, November 13, 2011

caramelized onion & goats cheese pizza

thin crust vegetarian delight
Creamy goats cheese, sweet caramelized onions, portobella mushrooms, and spring mix to top it all off. This pizza is deliciously vegetarian and satisfying.  Sonia, this was made with you in mind!

what you need:
  • pizza dough
  • 3 large yellow or vidalia onions
  • 1 portobello mushroom
  • about 1/2 cup goats cheese
  • about 3/4 cup shredded mozzarella
  • 1 big handful spring mix salad
  • extra virgin olive oil 
  • salt & pepper
  • red chili flakes 
what to do:
  1. To caramelize onions: this is a long process so start here first!  Chop onions into thin slices and get about 1 tbsp oil heating in a non-stick pan on medium heat.  Saute onions until they are caramelized (browned, sticky and slightly sweet) - it will take about 15 minutes and you will need to toss / stir them occassionally.  Do not turn the heat up or you will burn them.  Add salt, pepper and red chili flakes to taste, then remove from heat.
  2. Slice mushroom and roll out pizza dough.
  3. Brush pizza dough lightly with olive oil.  Load up the pizza dough first with a generous layer of caramelized onions, then top evenly with mozzarella, crumble goats cheese all over, and mushroom slices.  Bake on a pizza stone or pan for 10-12 minutes - until edges of pizza crust are golden brown.
  4. Remove from oven and top immediately with spring mix, they will wilt slightly from the heat of the pizza.  Slice it up and enjoy!

Tuesday, November 8, 2011

samosas


This weekend I had my friends Liz and Sonia over for a girls weekend! We made a great dinner on saturday and samosas was on the menu.  Although these samosas are not exactly like traditional Indian samosas, they are really good and good for you.  Typically samosas are pockets of dough filled with garam masala spiced potatoes, green peas and then deep fried.  These ones were made with sweet potato, carrots, green peas, tofu, and a homemade blend if Indian spices including turmeric for a lighter flavour.  Even Sonia approved:)

what you need:
  • phyllo pastry (thawed, room temperature)
  • 1 small sweet potato
  • 2 carrots
  • 1 cup frozen green peas
  • 200 grams firm tofu
  • 1 medium onion
  • 3 garlic cloves
  • canola oil
  • 1/4 cup butter, melted
  • 1/2 cup cold water
for the spices:
  • 1 tsp each ground turmeric, coriander seed, cumin
  • 1/2 tsp ground ginger
  • 1/2 tsp red chili flakes (optional)
  • 1/2 tsp mustard seed
  • salt and pepper
*you may choose to use garam masala instead (a blend of spices you can buy)
what to do:
  1. Dice the onion, and roughly chop garlic into small pieces.  Dice sweet potato, carrots, and tofu into small cubes, try to cut them about the same size.  
  2. In a large pan, heat up 1 tbsp canola oil on medium.  Add the mustard seeds; once they start making a gently popping noise (about 2-3 minutes), add the onions and saute until slightly translucent.  Add the rest of the spices and stir.  After about 1 minute the aroma should be intense, add in the rest of the vegetables and garlic.  Saute for another 2 minutes, then add water.  Cover and allow to simmer for several minutes.
  3. Remove cover after about 8-10 minutes and check if vegetables are tender.  If they are, remove lid and turn the heat down to medium-low and allow, if any, excess liquid to evaporate.  If the vegetables are still hard and your pan is dry, add a little bit of water and cover again.
  4. Remove vegetable mixture from heat and add frozen peas, stirring to incorporate.  At this point, add salt and pepper to taste.
  5. Allow mixture to cool to room temperature (or it can be made a day in advance and refrigerated).
  6. Lay out phyllo pastry on a large cutting board (should be layers and layers stacked) and using the tip of your knife, cut into 2.5" strips.  Keep most of it under plastic wrap with a slightly moist tea towel on top to prevent drying out.
  7. Lay one strip of phyllo flat, brush with a thin layer of melted butter all over, then place a second strip on top.  Put 1 heaping teaspoon of the veggie mixture in one corner of the phyllo, then fold it over to make triangle (isosceles), and continue folding it upon itself until you are on the last triangle - brush with butter then seal to finish. 
Liz making samosas!
    folding onto itself into a triangle

    8.  Put them on a cookie sheet.  You can bake them right away at 425 F, for about 10 minutes.      
        Once they are gold brown, remove and place on a cooling rack for a few minutes and serve       
        hot with fruit chutney or plum sauce.  Enjoy!   

    9. You can also make these in advance; place the entire cookie sheet filled with samosas in the 
        freezer for about 20 minutes, then remove them and store in a container in the freezer to bake
        another day.
dinner with friends!

Sunday, November 6, 2011

broccoli mac & cheese

hearty comfort food

This recipe is dedicated to my brother, Jiash.  The first time I made mac and cheese was with him and it was pretty hilarious. I thought I could do it without following a recipe and I proceeded to instruct him on what to do.  I didn't bother to grate the cheese and we ended up with a huge lump in a pool of skim milk and butter.  In the end it was actually quite tasty, but maybe not the most attractive dish.  I've since modified my recipe and this one includes broccoli for some green goodness.

what you need:
  • 1 small broccoli
  • 3 large shallots
  • 3 large garlic cloves
  • 2 cups freshly grated extra old cheddar
  • 1 cup freshly grated mozzarella
  • 400 g dry macaroni pasta
  • 1 tsp Worcestershire sauce
  • a small pinch of nutmeg
  • 1 tsp red chili flakes
  • salt and pepper
  • 1/2 cup breadcrumbs
  • 1/3 cup grated Parmesan 
  • 2 tbsp unsalted butter
  • 2 tbsp flour
  • 1 1/2 cup 1% milk
what to do:
  1. Prep everything you need: clean broccoli and trim rough parts off stems.  Finely chop stems, set aside.  Roughly chop up florets and set aside in a separate bowl.  Finely chop garlic and shallots.  Grate cheeses.  Mix grated Parmesan with breadcrumbs.  Preheat oven to 425 degrees F and start a pot of water to boil pasta in.
  2. In the meantime, heat up 1 tbsp of canola oil in a large non-stick pan.  Add shallots and broccoli stems, saute for about 2 minutes then add garlic and broccoli florets.  Season with pepper, salt, and red chili flakes.  Saute for another 2-3 minutes, then remove broccoli and set aside in a bowl.  
  3. Put a generous amount of salt in the boiling water and add pasta.  Should take about 8 minutes or so to cook to al dente.
  4. In the same non-stick pan on medium, heat up butter and then whisk in flour and keep stirring, making a roue.  Heat milk in microwave for 1 minute.  After about 3 minutes, slowly add milk, continuing to stir to avoid lumps.  Turn off the heat and add cheddar and mozzarella, stirring to incorporate.  Season with nutmeg, Worcestershire, salt and pepper.
  5. Drain pasta when al dente, reserving about 1 cup of pasta cooking water.  Fold pasta with cheesy mixture, and add in the broccoli.  Add a small amount of pasta cooking water to loosen the sauce, if it appears too dry.
  6. Pour pasta into a buttered baking dish.  Top with breadcrumb mixture and bake in oven for 12 minutes.  For the last 2 minutes, turn the oven to broil to brown the top (keep a close eye to avoid burning).  Serve hot and enjoy!

served up in a bowl, hot and gooey

so...this was that first time (years ago!)
 the cheese that couldn't quite melt. haha

Saturday, October 22, 2011

fresh local turkey

mom and little brother ray
Ok so my co-worker Dawn lives in Gananoque, just outside of Kingston, and her husband Joe raises turkeys on their property.  These turkeys are known for being flavourful, lean and just plain good because they are grain fed and not cooped up in a cage.  I just couldn't resist getting one (a 15 lb considered small....it was huge!) - but very unfortunately I didn't let my mom know in time so she had already purchased one at the grocery store and marinated it.  I was forced to butcher the turkey because my freezer is not big enough to store it whole.  I got a good lesson from my mom on how to separate it into parts on Thanksgiving, while my brothers watched and learned as well.  It's kind of like butchering a chicken, but in a much larger and tougher scale.  We ended up freezing it into 6 separate portions- 2 breasts, 2 thighs + wings, and 1 tupperware full of bits of meat that was trimmed away from the back bone - which was made into a tasty noodle dish.  The back bone was used to make a great stock.